This guide covers how to create and open zip files on a Chromebook using the ChromeOS Files app, making it easy to manage compressed files.
How Can You Zip Files on a Chromebook?
You can compress files directly within ChromeOS’s built-in Files app.
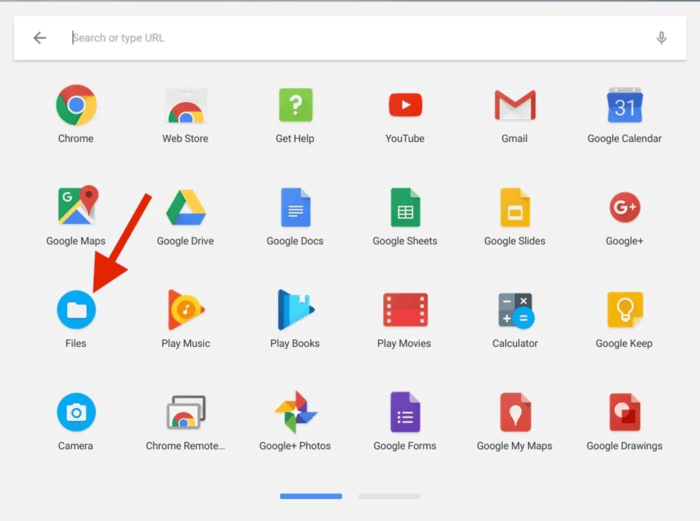
1. Open the app launcher and select Files.

2. In the left sidebar, find the files you want to compress. Use the following methods to select files:
- To select a range of files, click the first file, hold down Shift, and click the last file.
- For individual selections, hold Ctrl and click each file.
- To select all files in a folder, press Ctrl + A.
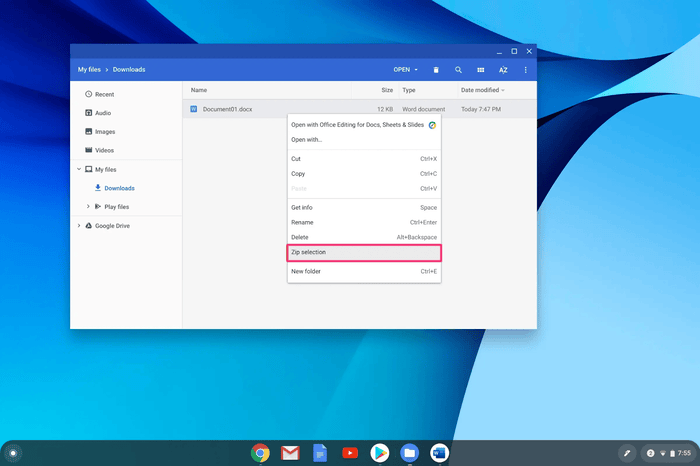
3. Right-click the selected files and choose Zip selection. The compressed file, named Archive.zip, will appear in the same folder. If you zipped a folder, the zip file will have the same name as the folder but with a .zip extension.

- To rename the zip file, right-click it and select Rename.

How Do You Unzip Files on a Chromebook?
Unzipping files on ChromeOS involves extracting them manually rather than unzipping the archive as a whole.
- Find and double-click the Archive.zip file in the Files app to open it and view the contents.
- Select the files you want to extract, right-click, and choose Copy.
- Go to the folder where you want to place the extracted files, right-click, and select Paste. The copied files will appear in this new location and be ready for editing.
- Files in a zip folder can be opened without extraction, but changes cannot be saved to them.
- Once finished, click Eject next to the archive in the Files app’s left sidebar to close the zip file.

