


A client needed their logo on a printed banner. The file they sent over looked perfectly fine on screen, sharp edges, clean colors, everything sitting exactly where it should be. Two days later, the print shop came back with bad news.
The logo had come out blurry, and the whole banner needed to be redone. Nobody had checked the resolution before sending it off, and what worked fine at 72DPI for a website had no business being stretched across a printed banner.
It is a more common problem than most people expect, and tracing it back usually leads to the same place. DPI behaves differently depending on where an image ends up, and that difference matters a lot more in print than it ever does on a screen.
What is DPI?
DPI is short for Dots per Inch. The concept is straightforward enough once you see it for what it is. Pack more dots into a single inch, and you get more detail, which is why higher-DPI images hold up better when they hit paper rather than falling apart into visible pixels.
72DPI became the screen standard because that is genuinely all a monitor needs to display an image clearly. Everything looks sharp at that density on a digital display, which is why most images built for the web are saved at 72 DPI without anyone losing sleep over it. The issue only surfaces when those same files need to go somewhere physical.
300DPI is what printing actually requires. At that density, fine details hold together properly, edges stay clean, and things like gradients print smoothly rather than showing banding or breaking apart into visible pixels.
Business cards, letterheads, packaging, signage, brochures, all of it needs files at 300DPI minimum to come out looking the way anyone intended. A logo saved at 72 DPI for a 300 DPI print job will let someone down every single time.
Can I Upscale a Logo Without Quality Loss?
The traditional answer to this was not great news for anyone hoping to avoid going back to the original files. What traditional upscaling actually does is take existing pixels and stretch them to fill the space required by the larger size.
Nothing about the actual detail improves, because there was never any detail to pull from in the first place. The logo gets bigger, the file gets heavier, and the blurriness comes right along for the ride.
Going back to the original vector file and exporting at the right resolution has always been the proper solution.
Vector files hold their quality at any size because they work from mathematical paths rather than a fixed pixel grid, so scaling them up never causes the problems that raster files run into.
The catch is that the vector file must exist, which isn’t always the case, particularly with older logos or files that changed hands without the source documents making the trip.
AI upscaling shifted this conversation in a way that actually matters. Instead of stretching what is already there, AI tools study the image and generate new details that make sense within the context of what already exists.
Edges get rebuilt, fine details come back, and the output holds together at higher resolution in a way that traditional resizing could not manage. The result will not be the same as a native 300DPI export, and it would be misleading to suggest otherwise.
What it does do is get close enough to be practically useful in situations where the source files are no longer accessible.
How to Upscale a Logo from 72DPI to 300DPI?
Before reaching for any other solution, it is worth checking whether the original vector file is still accessible somewhere in AI, EPS, or SVG format. Exporting directly from there at 300 DPI is the cleanest and most straightforward option when available.
When the only available file is a raster version, AI upscaling is the next-best option. The process is straightforward enough: upload the file, choose the output resolution, wait for the AI to work through it, and download the result.
Where this shows up most clearly with logos is in how the edges appear after processing. Clean, sharp edges are what separate a logo that reads as professional from one that looks like it got pulled off a website and resized in a hurry.
The Wink Image Enhancer
Wink AI image enhancer handles enhancement and restoration without making the process overly technical. The AIGC-powered technology goes past basic sharpening and reconstructs actual detail rather than just amplifying what was already visible in the original file. It enhances image quality.
Specifically for logos, Wink’s scene-based processing recognises graphic content. It treats it differently from photographic images, which matters because the sharp edges and defined lines in a logo need genuinely different handling than skin texture or a landscape photograph would.
Adjustable enhancement strength lets you control how aggressively the AI works through the file, which is useful for logos where pushing too hard can introduce artefacts into otherwise clean graphic elements.
How Can I Upscale My Logo with Wink AI?
The logo used for testing was a brand mark set to 72 DPI. Sharp enough looking on screen, but not something any print shop would be happy to receive without raising an eyebrow.
Step 1: Upload the Logo
Dragging the file into the Wink dashboard took a couple of seconds to upload to the AI image upscaler. No format conversion required and no complicated setup standing between uploading the file and actually getting started.

Step 2: Choose Enhancement Type
General enhancement was the right call for a graphic file with clean edges and defined shapes. HD resolution was selected as the output target based on where the logo would ultimately be used.
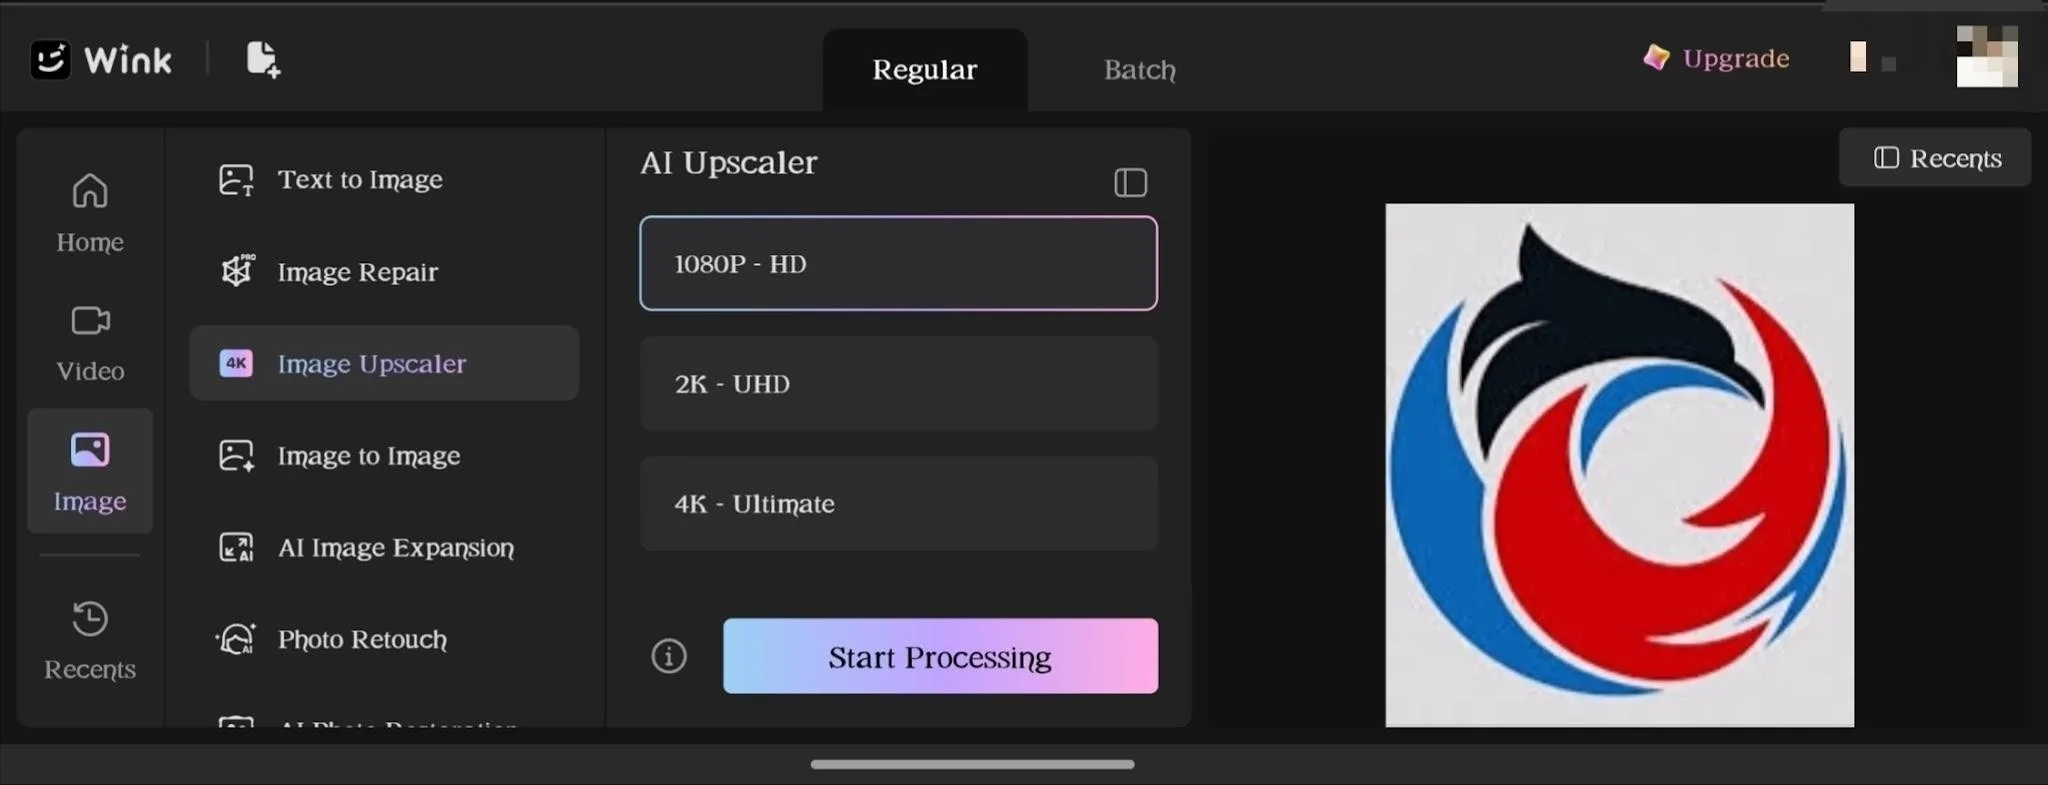
Step 3: Process and Preview
The side-by-side comparison came up quickly after processing finished. Edges that had been slightly soft in the original came back sharp and properly defined.
Fine details in the logo mark that had lost clarity at the original resolution became clean and readable again. The result looked like something belonging in a print-ready file rather than something scraped off a website.
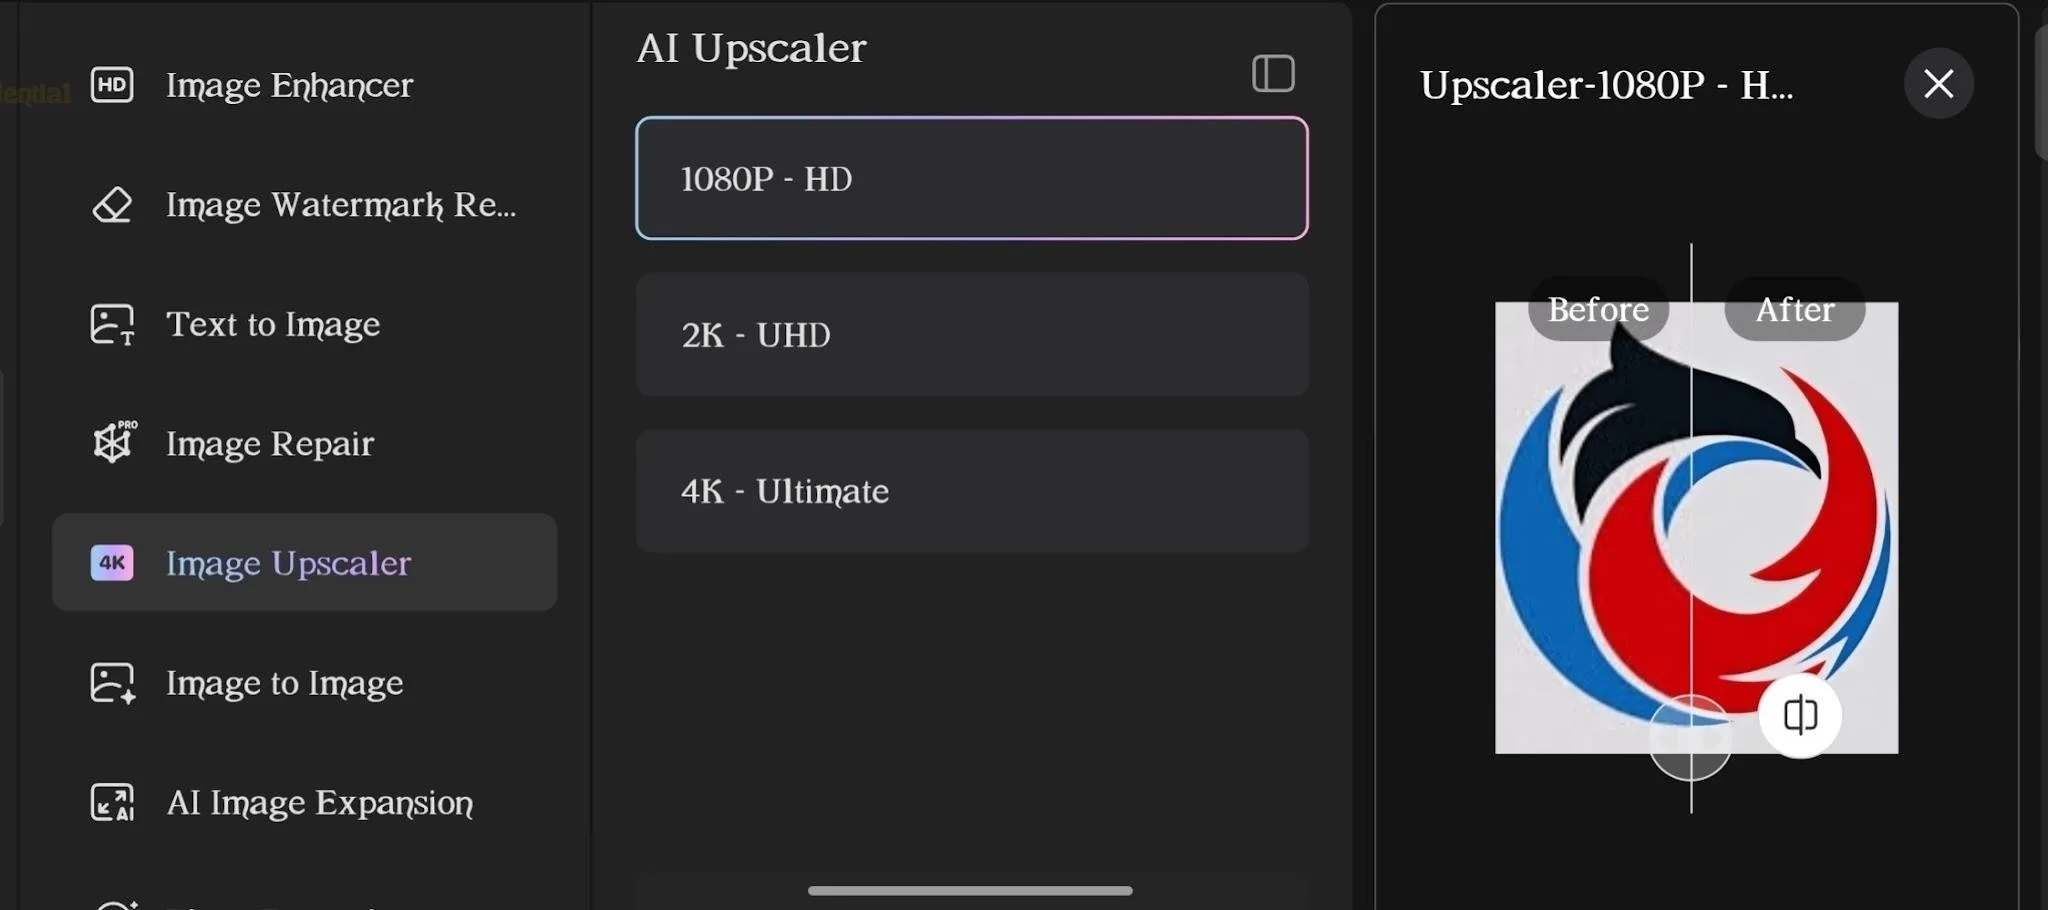
Step 4: Download the Result
The enhanced file downloaded cleanly and held up properly under close inspection. Edges were sharper throughout, details were better defined across the whole mark, and the overall quality made it genuinely suitable for print use, whereas the original would have caused problems. The whole thing ran from first upload to final download in under two minutes.
