
Earlier this week, a reader emailed me asking how to edit PDFs on a Chromebook. She wanted to know what the best app might be for downloading, filling in, editing, and then sending out PDF documents. The downloading and sending are the easy parts. Here’s how to edit PDFs on a Chromebook natively, without using a third-party app.
For years, you could easily view PDFs on a Chromebook simply by opening them. If you wanted to edit a PDF on a Chromebook though, you’d need some web app or Chrome extension.
That actually started to change with ChromeOS 73, when Google added annotation support in PDFs. More recently, ChromeOS 104 built on that feature, letting you edit PDFs on a Chromebook in the Gallery app. Aside from adding notes or a signature, you can add text to a PDF. Here’s how:
Download a PDF on your Chromebook
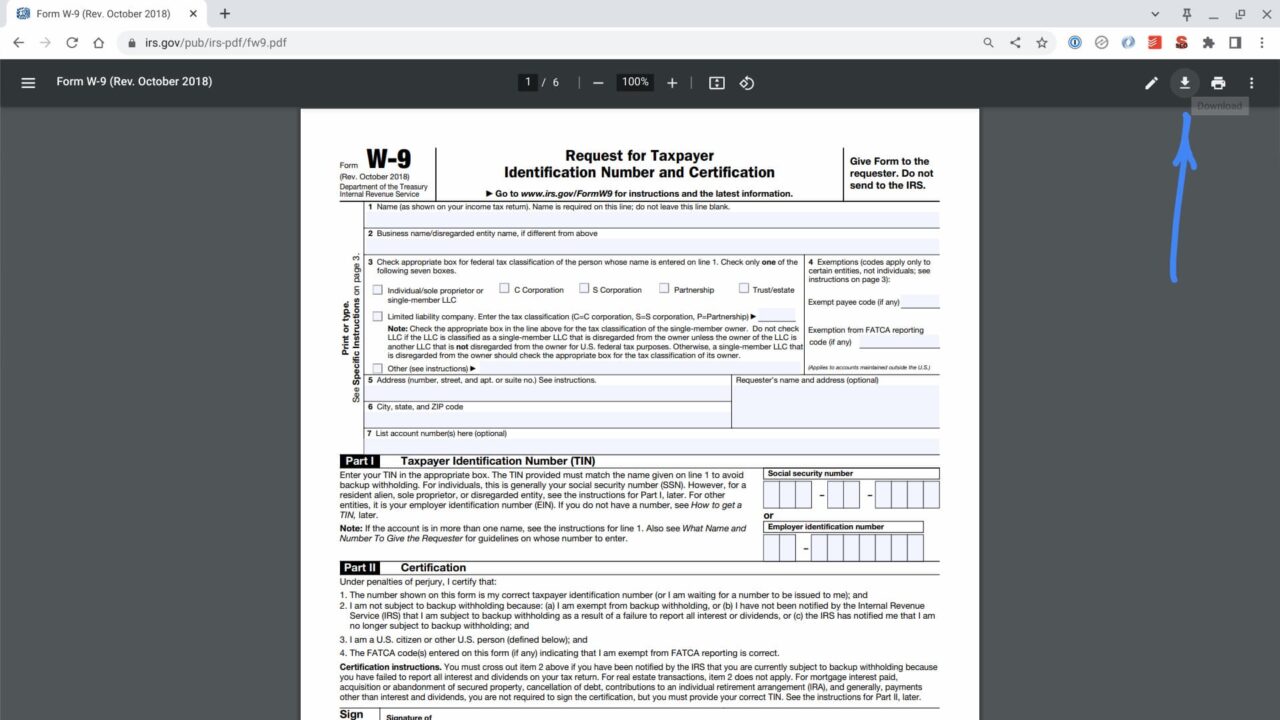
For my example, I’m simply using the Chromebook browser to download a PDF form from the IRS. The PDF opens in my browser and I can click the Download icon to save a copy of the PDF. The downloaded form will be saved on the hard drive of my Chromebook.
Open the PDF using the Chromebook Files app
With the PDF saved to my Chromebook, I can see the file in the Chromebook Files app. Double-clicking the PDF file will open the ChromeOS Gallery app by default, as shown here when I right-click on the file options.
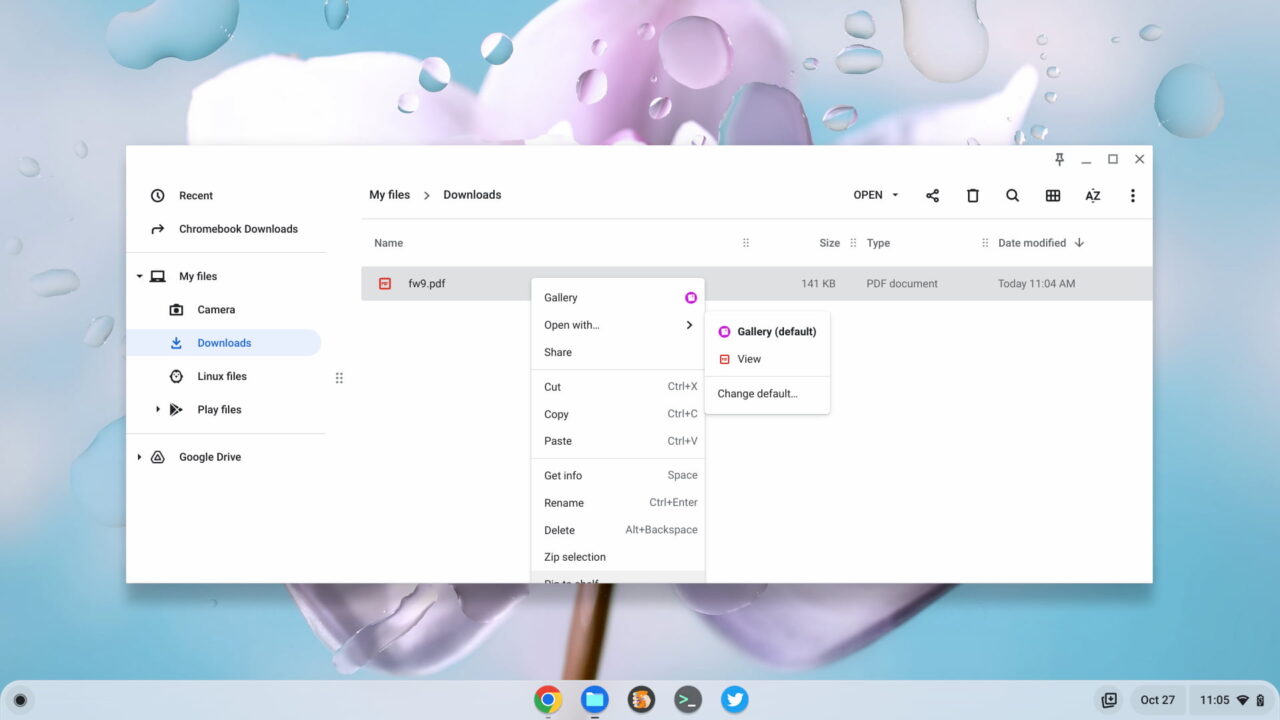
The above is just to illustrate the default app that opens downloaded PDFs on a Chromebook. You can simply double-click on your downloaded PDF.
Use the Gallery app
Once the Gallery app opens, you should see the PDF you downloaded. In the top menu bar, there are two key buttons needed to edit PDFs on a Chromebook. One adds a text box that you can fill with any text you like. The other is used to add digital ink to your PDF. You can use this for any freeform notes or for any signatures required on the PDF.
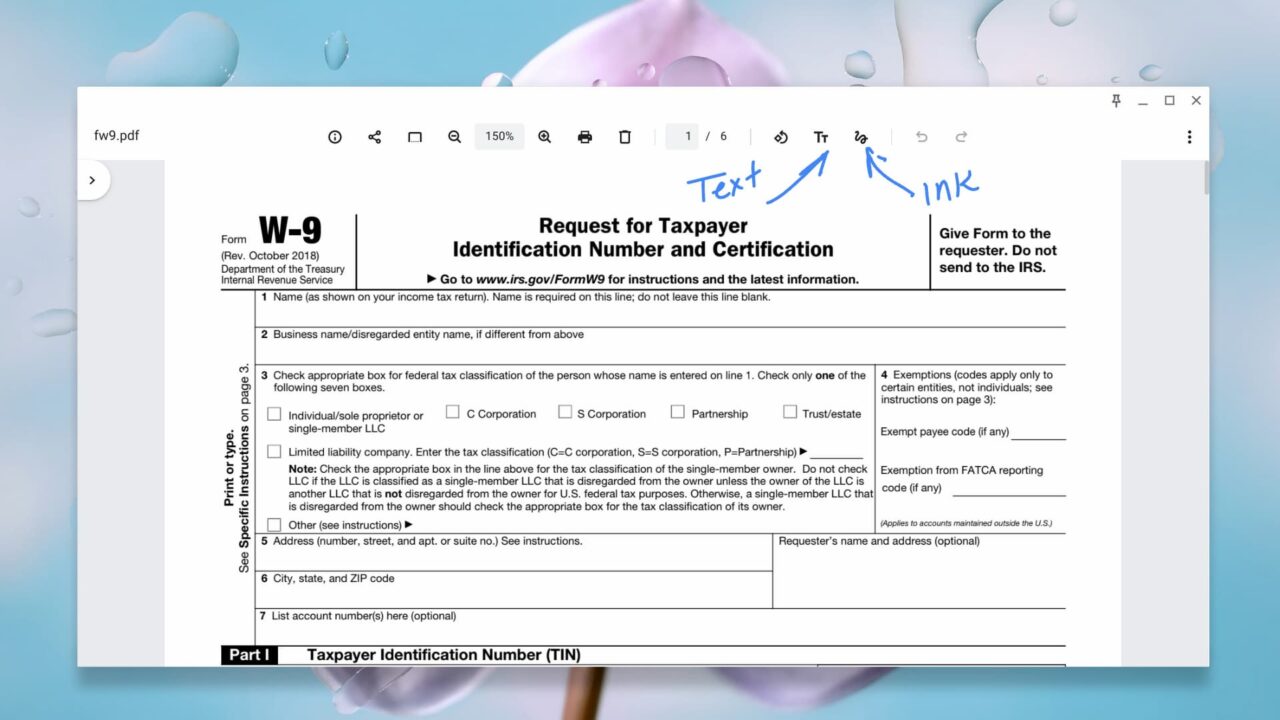
How to add text to a PDF
To add text to a PDF, click the Text button in the Gallery menu bar. This will open up new options so you can choose the font, font size and color of text you want to add. Then, click on the PDF where you want to add text.
In this example, I added three text entries. You can see from the last one, which is still active for adding text, there are draggable borders for your text entry. You can click and drag your text or change the size of the text box with these borders.

After you edit the PDF on your Chromebook by adding text, be sure to click the Save button at the top right of the Gallery app. If you want to retain the original PDF, select the arrow to the right of the Save button and choose the “Save as” option.
How to add digital ink to a PDF
To add ink to a PDF, click the Annotate button in the Gallery menu bar. This will open up new options so you can choose the ink thickness and color of ink you want to add. You can also select between a pen, a highlighter, or an eraser. Choose the pen and use a stylus (or in the worst case, your finger) on the PDF to annotate it.
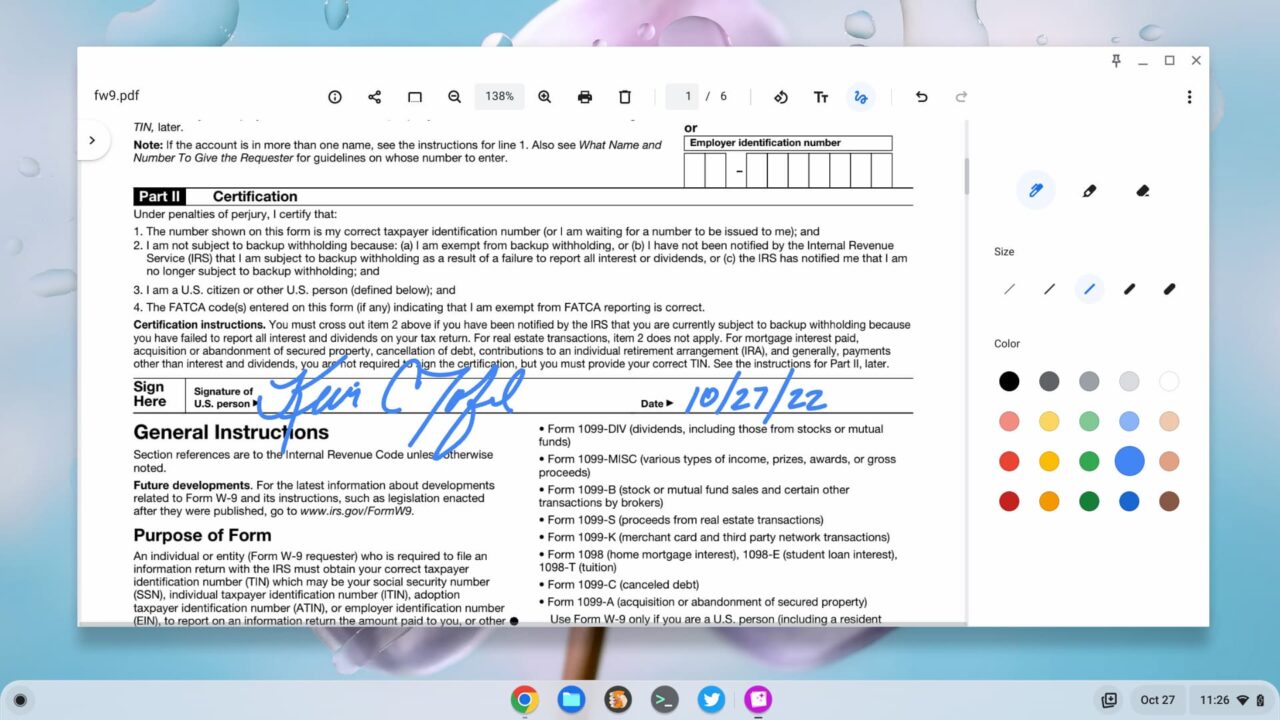
Above is that same PDF file I’m editing on my Chromebook. Instead of using text, I used the pen annotation option to sign and date the PDF. Note that you have to Save the PDF or you’ll lose your edits.
Send that edited PDF from your Chromebook
After you edit the PDF on your Chromebook completely, you should have a saved file with all of your text and/or ink edits saved. From there, it’s simply a matter of sending the edited PDF from your Chromebook to whoever needs it.
Typically this is done by email, where you can attach the edited PDF to your message. I sometimes upload my edited PDFs to Google Drive and share a link to the file. And if you need a hard copy, you can always print your PDF.
To keep up with any changes on how to edit a PDF on a Chromebook, watch Google’s support page here.
1 Comment
I like all the new native PDF editing / filling improvements for Chromebooks recently.
However for me, I still struggle with signing documents using my stylus on my Chromebook. My sig always looks like I contracted a 5 year old to do it for me ;o)
I’ve wondered about getting a screen protector with a matte or paper-like surface to see if that helps with better writing but so far haven’t gotten one. The surface of my screen is very shiny.
So for now I use a scan of my sig from a paper copy.
The trouble is that the native PDF editing on Chromebooks doesn’t appear to allow for this.
So instead I use https://www.sejda.com/ which seems to me to be the most useable of the online PDF editing options.