
Although it was teased last year, the new Google Photos video editor is now available for Chromebooks. While it definitely has more features than the older, bare bones version, it’s still limited. However, as a basic Chromebook video editor, it is a step forward. Here’s how to use the new Google Photos video editor on a Chromebook.
Make sure you have the latest Google Photos app
Right off the bat, I didn’t see the new video editor on my Chromebook. Since Google is using the Photos app for Android, I figured I’d check for updates. Sure enough, one was available. So you’ll definitely want to make sure you have the latest Google Photos app from the Play Store installed on your Chromebook.
Interestingly, I didn’t see any mention of the new Chromebook video editor in the app’s release notes. Then again, most people using Google Photos are using it on an Android device. This additional feature isn’t relevant to most of those folks. Still, it would be helpful for Chromebook users to see the feature addition in the app description.
Hop into the Utilities section of Google Photos on your Chromebook
This is another bit of a head-scratcher to me: Finding the Chromebook video editor isn’t quite intuitive. It’s buried in the “Utilities” option of Google Photos. You’ll see that option in the left menu of Google Photos. Click it and look for the “Create” section and then choose the “Movie” option.
If you have the newest Google Photos version installed, you should see this updated creation menu:
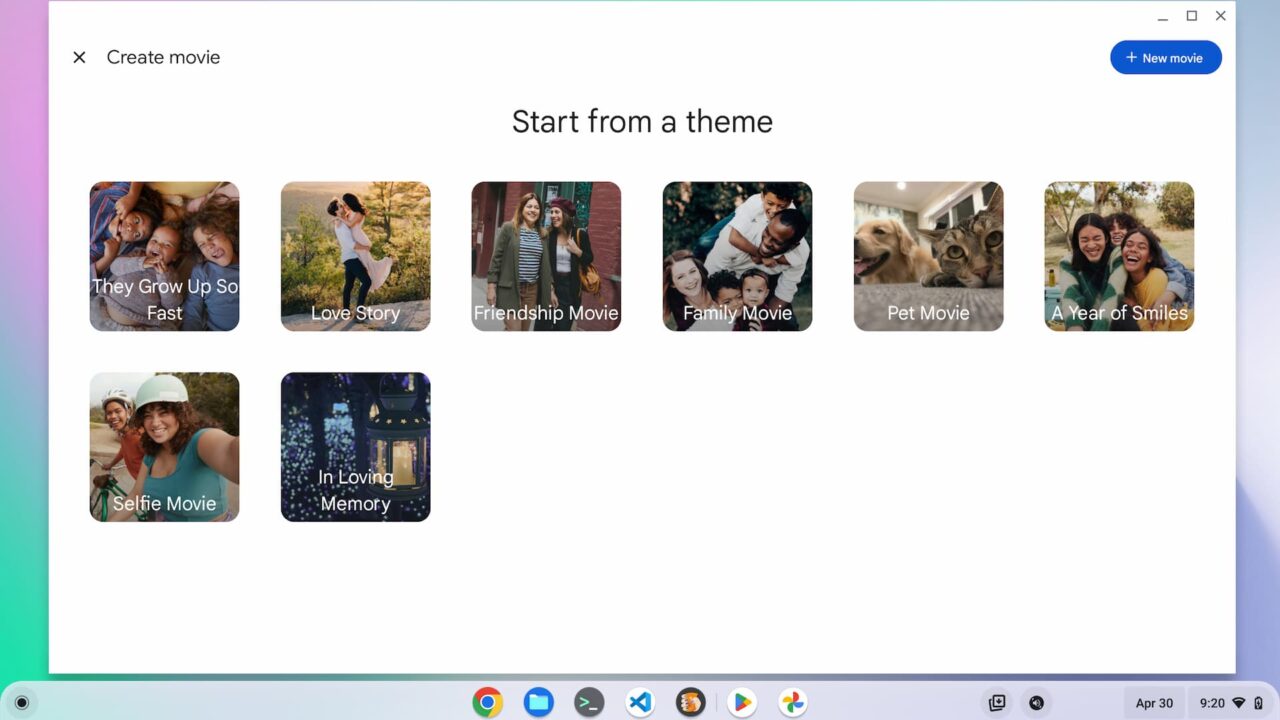
For my testing, I didn’t want to use a theme. Clicking the “New Movie” button starts with a clean slate.
Import clips to the Google Photos video editor
After selecting a theme or choosing to create a new movie, you have to import clips and/or photos to the editor. These all come from Google Photos and I do like that you can search for content.
In my case, I searched for “videos” and selected a few clips that I had previously saved to Google Photos.
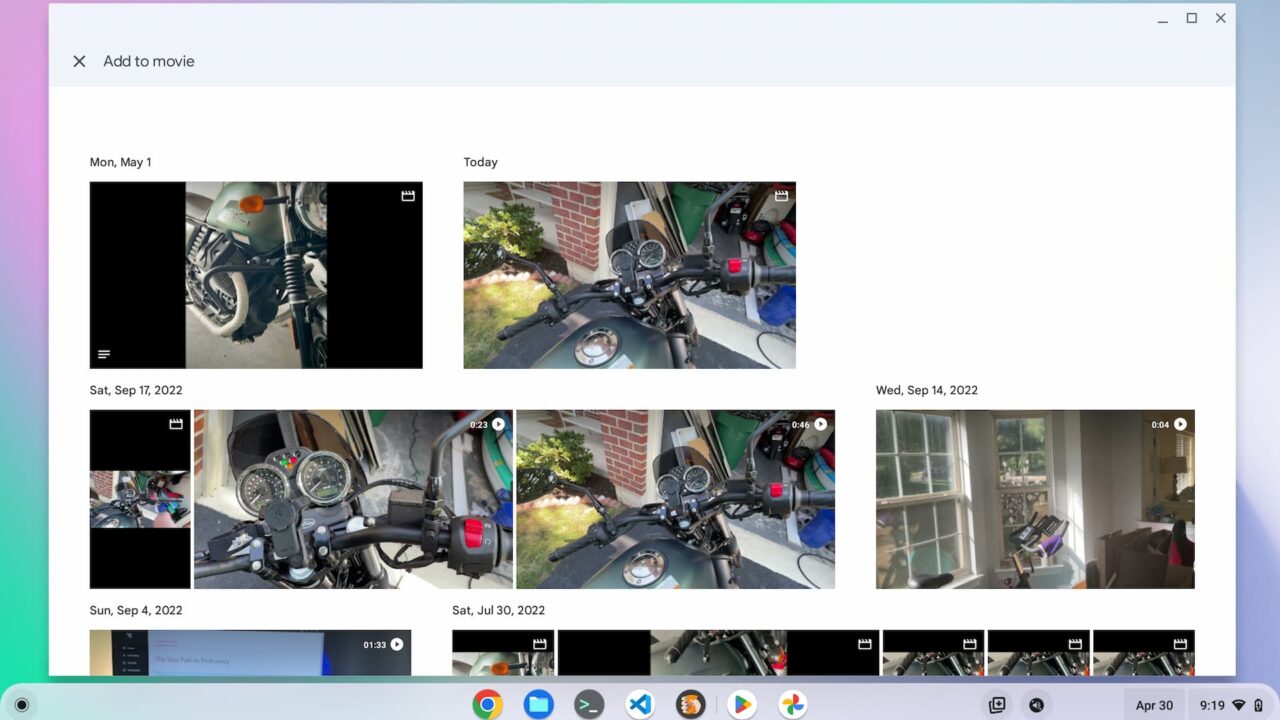
Once you’re done selecting the content for your video, Google Photos will download that content into the video editor. After all of the content is downloaded to your Chromebook, you can begin the editing process.
Limited video editing features
On the right side of the video editor are three main functions. You can change the aspect ratio of some, or all, of your video, for example.
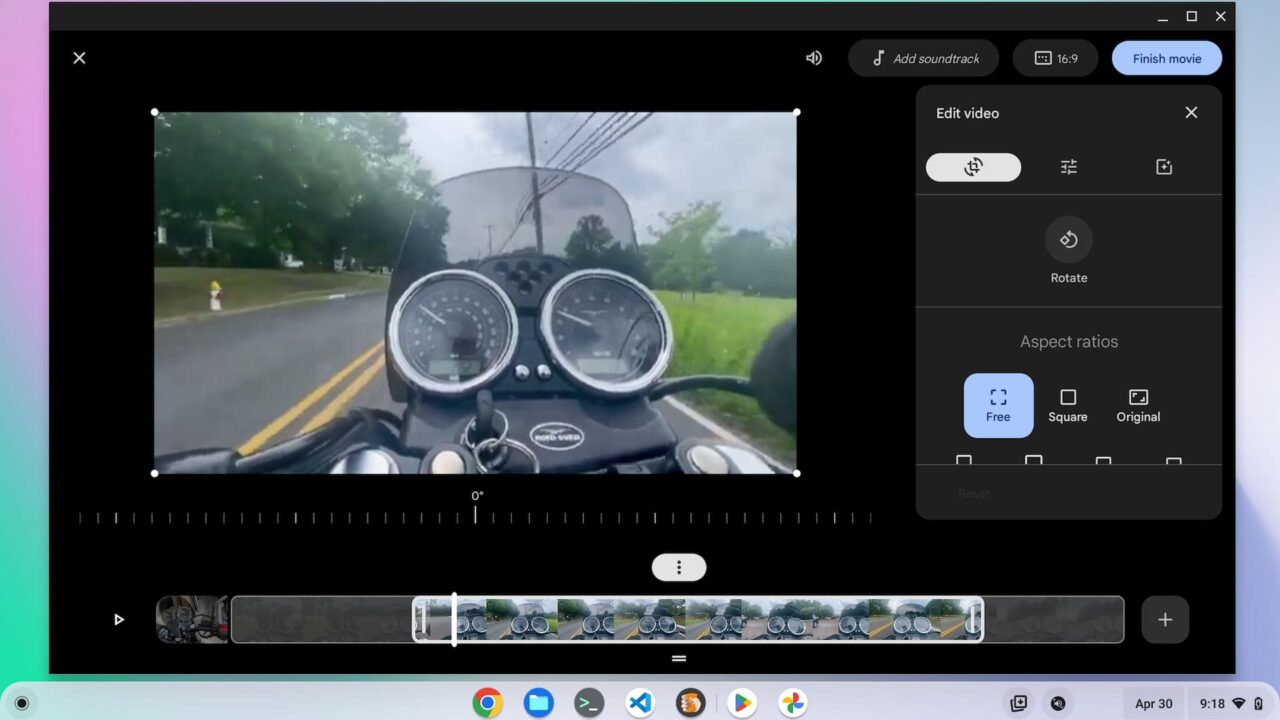
Above, I’m in the aspect ratio section, although I didn’t want to change anything. I have trimmed the beginning and the end of the second clip in my video, shown on the bottom timeline. The “+” button on the right side of the timeline lets you add more clips. And you can click the two lines under any clip to drag it to another spot in your timeline.
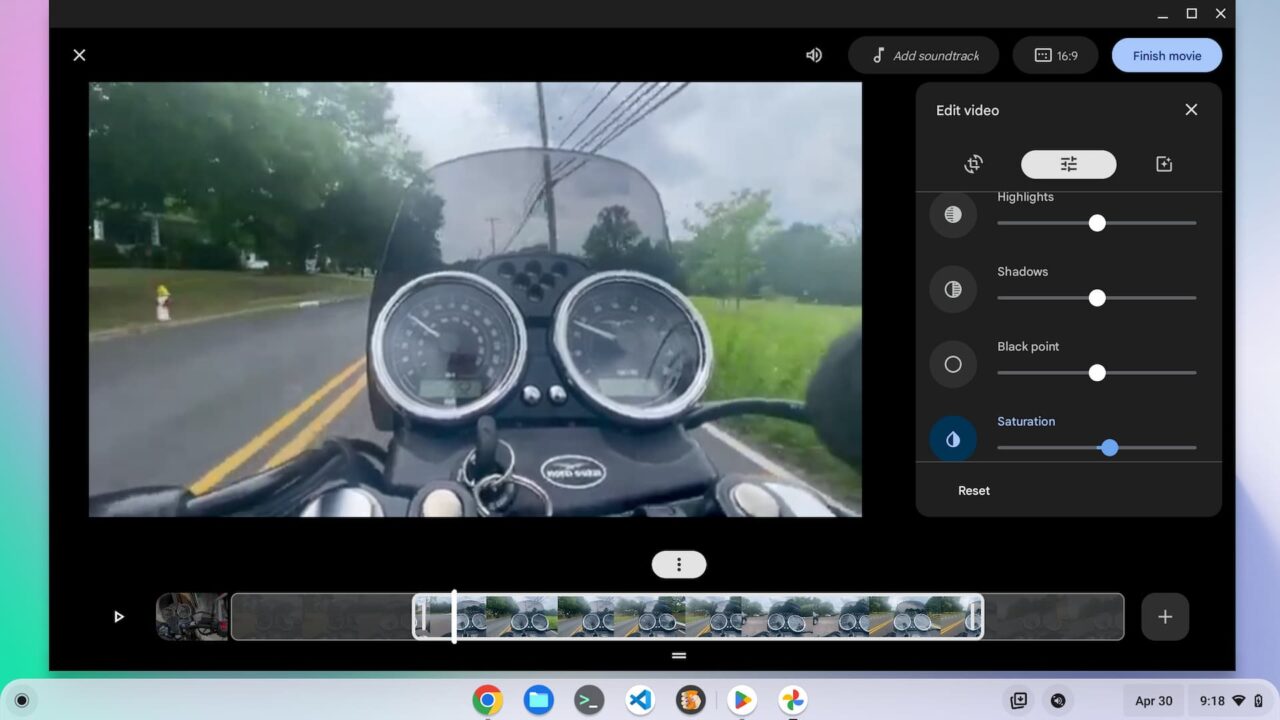
The second feature menu after aspect ratio is for image enhancements. Think of these like the controls for your photo edits. You can adjust highlights, saturation, shadows, etc… for any clip. For my video, I boosted the color saturation a smidge.
The third menu option is for applying filters to your videos. Again, these are similar to the photo editing filters. I played with these but didn’t want to use any for my test video.
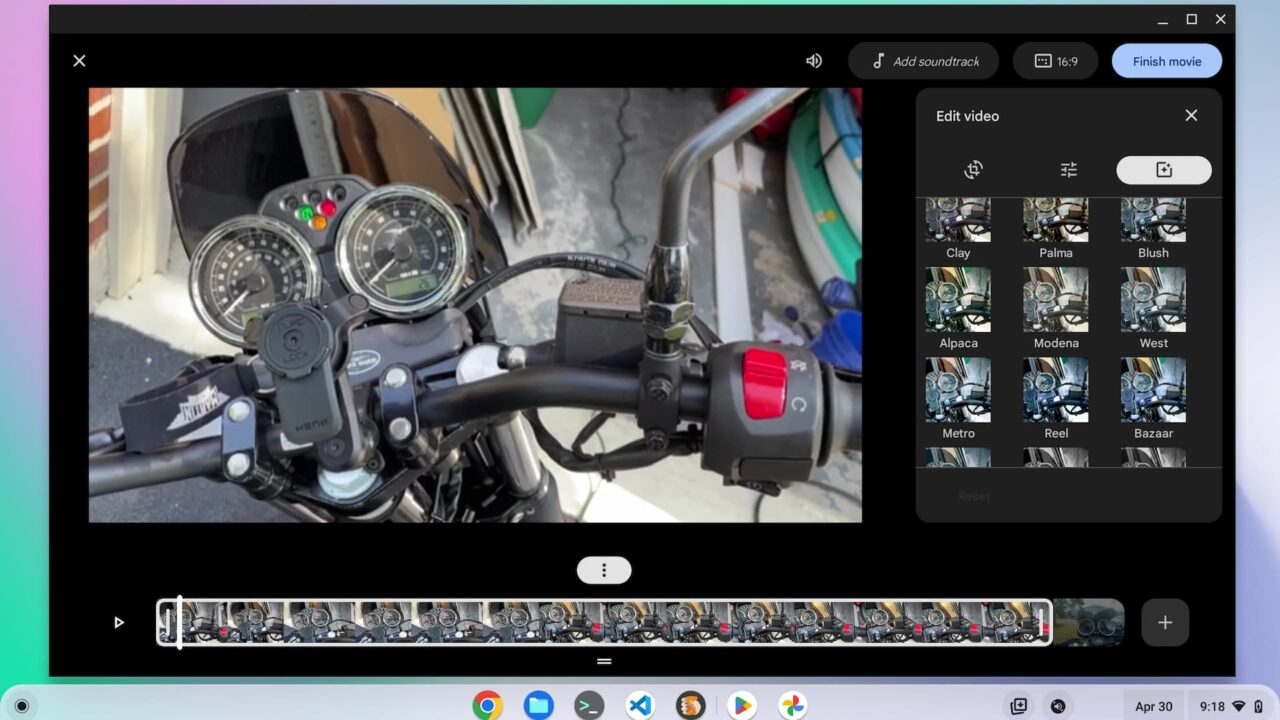
If you want to add a soundtrack to your movie, there’s a button above the editing menu for that. Google Photos includes plenty of options here, grouped by type of music. I added one for testing, which worked, but opted to remove it for my video. I wanted to hear the motorcycle sounds from my short ride after doing some work on the bike.
Export the movie from the Google Photos video editor
Once you’ve edited your clips into a cohesive movie, just click the “Finish Movie” button at the top right. Google Photos will crunch it all together and tell you that it’s processing your video. The processing time will depend on your edits and how long your movie is, of course. For the short video I put together in testing, that was about a minute or so.
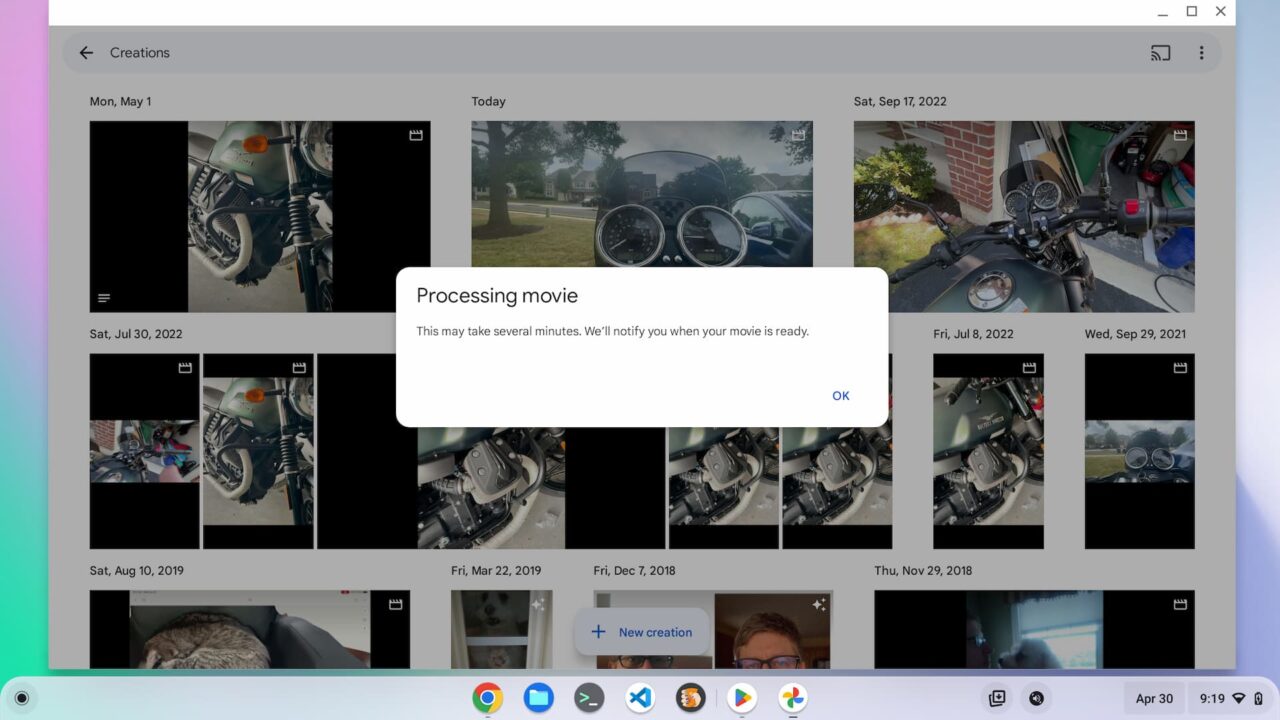
When it’s done, you’ll be notified the movie is complete and you’ll see it in Google Photos. Your edited movie isn’t stored locally on your Chromebook but you can certainly download it from Google Photos if you want. Look for your movie by clicking the “Creations” button in the main Google Photos menu. I used the “share” feature to upload my video to YouTube but there are plenty of other options for sharing or downloading.
Enjoy the video edited on your Chromebook!
When all is said and done, how do movies turn out? Not bad based on my test.
Here’s the video I created using this process. Note that you won’t see any transitions between clips; I don’t see a way to add any, which is another limitation.
Overall, the process of using the Chromebook video editor is relatively simple. Then again, the “app” is relatively simple as well.
Don’t expect any advanced functionality that you’d find in a full-featured video editor. LumaFusion offers much more control and many other options by comparison. Of course, that’s an Android app you have to purchase for use on your Chromebook. If you want a free video editor, well… you get what you pay for.
3 Comments
one thing i HATE about this is that you cannot use pictures from a folder. BEYOND annoying and totally thoughtless. E.G. you have a photo album which is a collection of the best pics you took on your recent trip to timbuktwo and you want to use those photos to make a movie. good luck with that idea!!!
I did try this (the video editor in Google Photos on my Chromebook).
I had a simple task.
I just wanted to cut a few segments into short videos from a much longer one.
This video editor was useless for this task as far as I can tell.
In the end I used ClipChamp. _Much_ better at least for this task – and free (thank you Microsoft).
The only problem with it was that when I exported out it produced massive files. After messing about with a few compression tools, I discovered that Google Photos deals with this automatically if you have settings set to Storage Saver when you upload anyway.
I tried the video editor on my Chromebook but despite the Photos app being up to date I could not see the plus sign to add a clip and also the photo animation ( zooming etc) was missing from my version.
The only really useful part of this app for me was the video stabilization function which seems to work quite well. A lot of work needed to make this app a viable editor, other than for the simplest of uses.