
If you’ve visited the Chrome OS subReddit, you’ve surely seen posts by Mr. Chromebox there. For several years, he’s been the go-to authority for doing major operating system and firmware changes to dozens of Chromebook models so you can natively install Windows or Linux on your device.
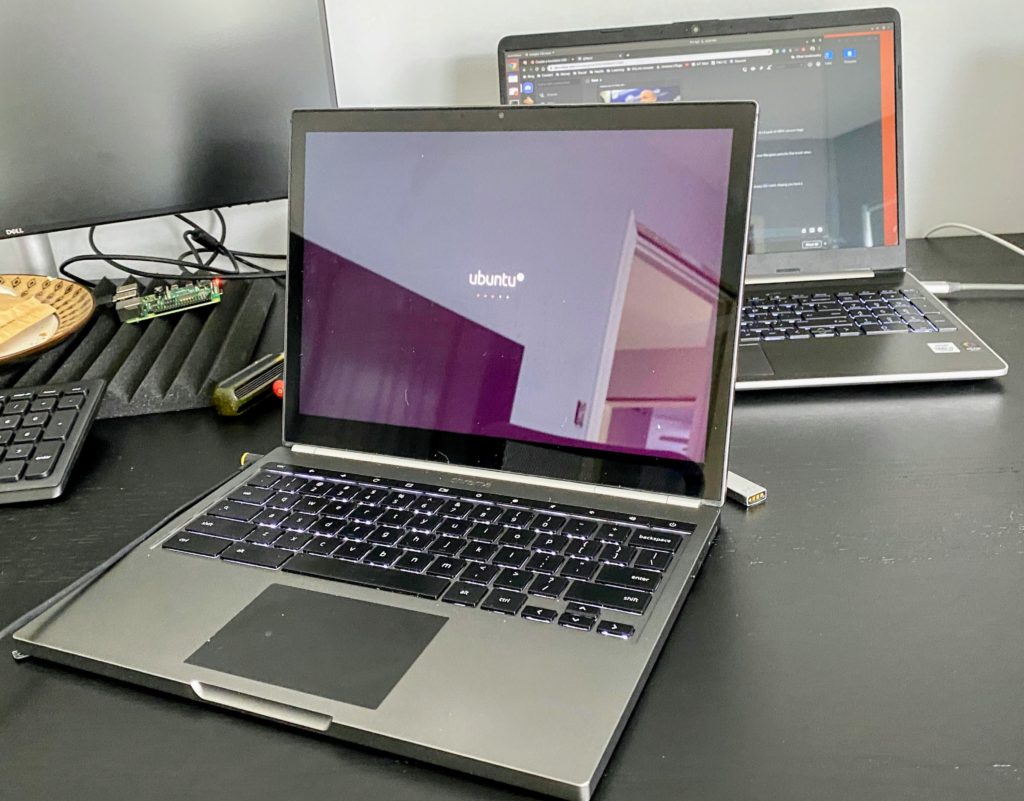
I haven’t delved into this type of esoteric but useful project in a while but a CompSci classmate is thinking about switching from Windows 10 to Linux. So I dug around the closet where good Chromebooks go to collect dust and found the 2013 Chromebook Pixel I bought new seven years ago.
This is a perfect candidate for a Linux installation because the last software update pushed to it was Chrome OS 69. So it’s not the most secure device for browsing at the moment.
Disable any write-protection
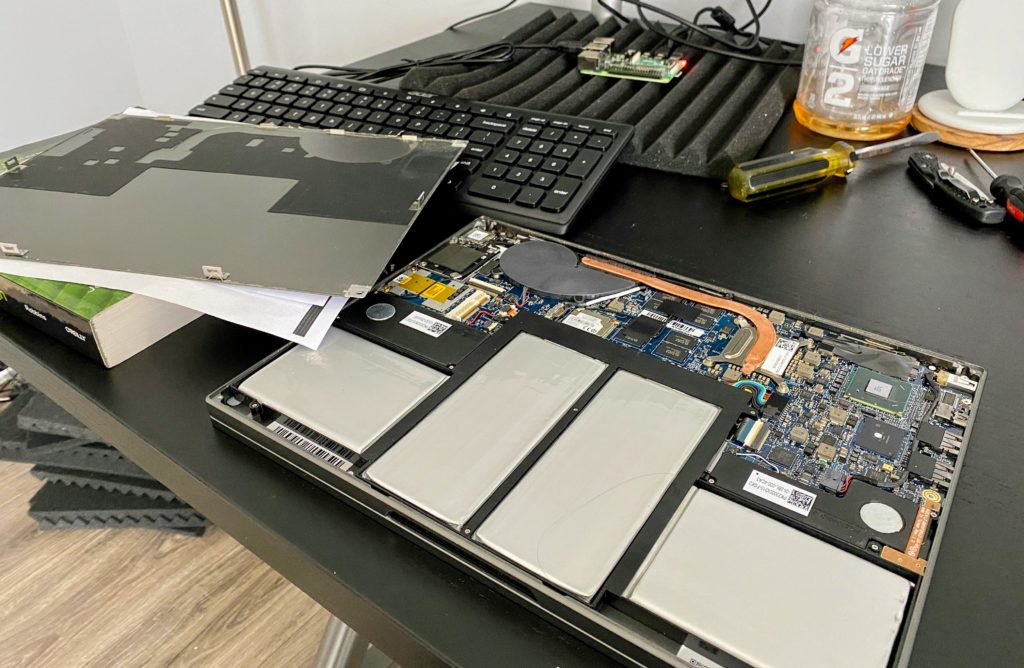
Before installing any firmware updates to support a different operating system, I had to crack open the Chromebook Pixel. Google put a physical write-protect screw on the motherboard and as long as that screw is in place, Chrome OS is the only game in town.
To open the laptop, I turned it over and carefully removed the four rubber pads that act as the “feet” of the Chromebook Pixel. They’re stuck on with some light glue and are pretty easy to remove.
And they hide four screws that attach the bottom of the laptop to the chassis. It took all of ten minutes to remove the feet and the four screws, leaving me with this:
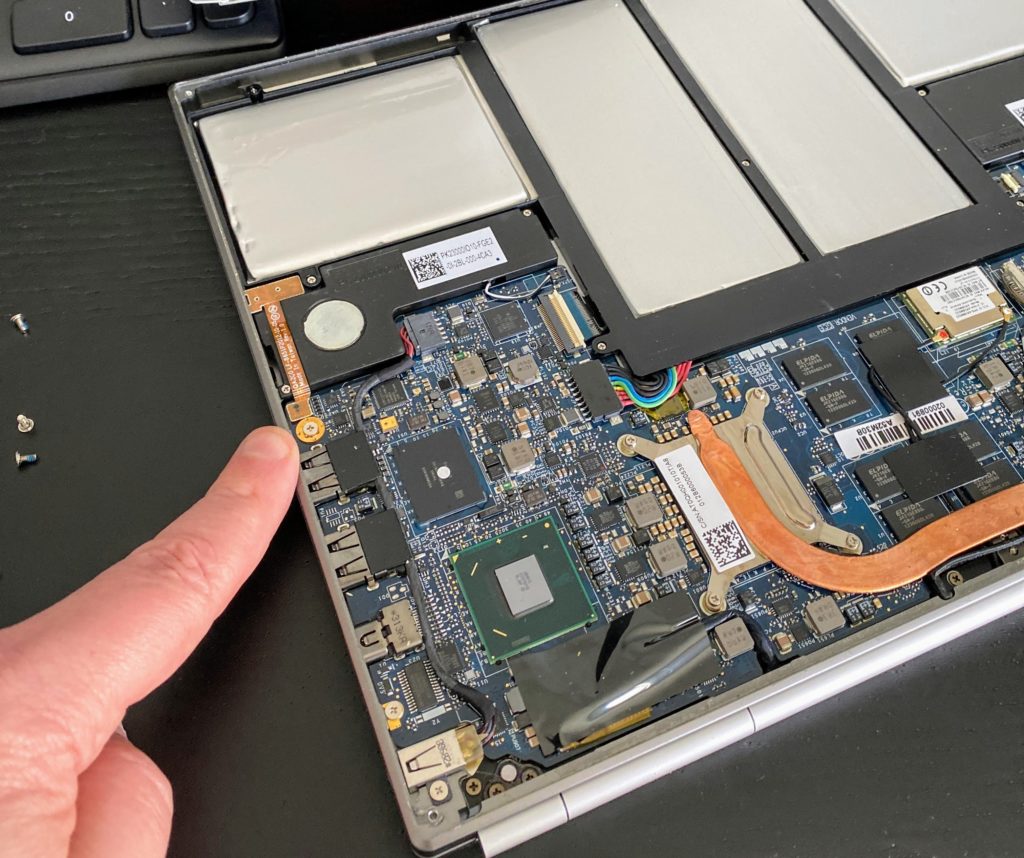
At that point, it took less than another minute to remove the write-protect screw. It would have gone quicker but that sucker was on super tight. Not all Chromebooks have one of these and use another method for protection, so if you ever go down this route, check Mr. Chromebox’s page listing of supported models and see which your device uses.
For the 2013 Chromebook Pixel, it’s this screw here, next to the USB Type-A ports:
With that screw removed, I simply reversed the disassembly steps: Put the cover back on the device, replace the four screws and finally, the four feet. I didn’t even reglue them because they were still quick tacky.
Enable Developer Mode
Next was to put the Chromebook Pixel in Developer Mode. Note this is very different than switching to the Dev Channel of Chrome OS.
Developer Mode removes some boot security features and I wouldn’t recommend using it for Chrome OS. However, to flash the BIOS and install another operating system, it’s required in this case.
After I rebooted into Developer Mode and logged in to Chrome OS, the next step was to open up the old crosh shell with the CTRL+ALT+T keyboard shortcut.
Download and upgrade the firmware
That brings up a terminal-like browser tab, where you then execute the shell command. From here, it’s a command to download and install Mr. Chromebox’s Chrome OS Utility Script:
cd; curl -LO https://mrchromebox.tech/firmware-util.sh && sudo bash firmware-util.sh
A few minutes after the download and install, I rebooted the Chromebook Pixel and was greeted by a menu similar to this:
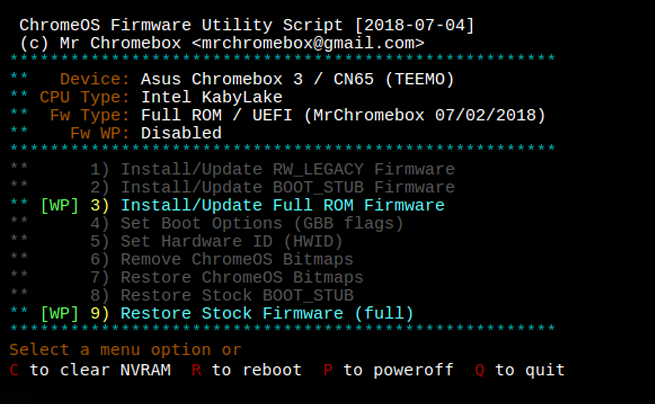
From here, it’s just a matter of choosing which firmware options you want to be installed. I opted for choice 3, was asked if I wanted my Chrome OS image backed up (I said no but you should probably say yes!) and the install begins.
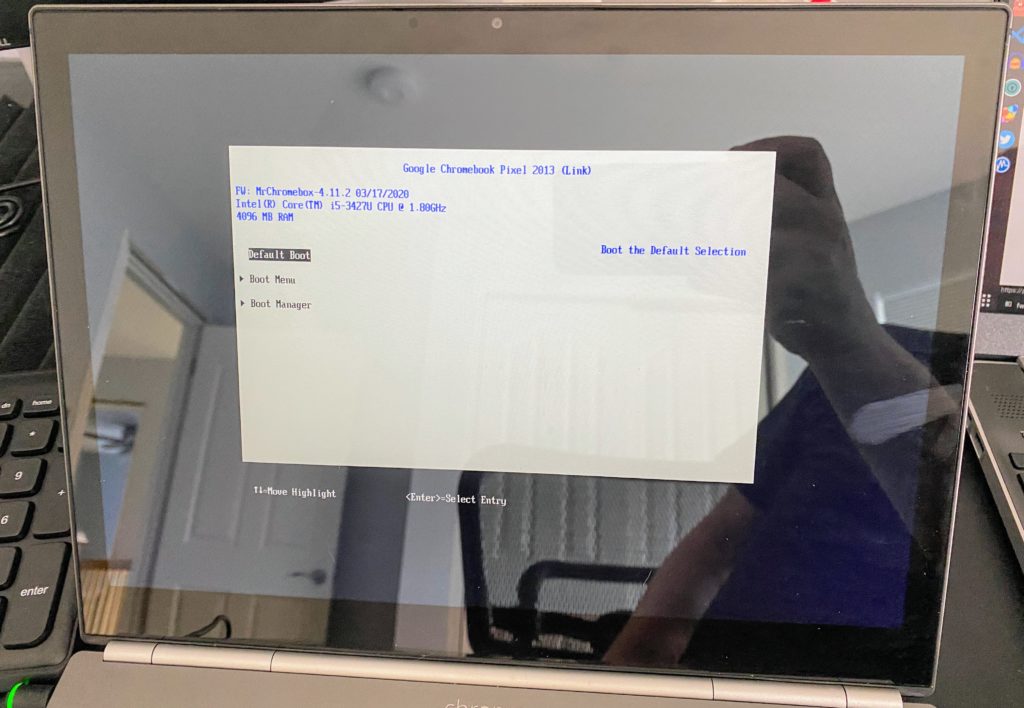
After a reboot, I was greeted with a traditional BIOS settings screen: success!
Install Linux!
At this point, the device is ready for an OS installation just like nearly any other computer! You’re not limited to Chrome OS any longer.
Using another computer, I downloaded the latest Ubuntu LTS image on to an SD card since the 2013 Chromebook Pixel actually has a memory card slot. I changed the Boot Device options in the BIOS and restarted the Chromebook to boot from the memory card.
After that, it was a typical Ubuntu install. And if I had chosen Windows, I’d be off to the races with Microsoft’s software from here on out.
Given that the 2013 Chromebook Pixel only came with 4 GB of memory and uses a third-generation Intel Core 5 processor, this won’t be a performance powerhouse by any means. Just for kicks after installing Ubuntu, I ran an Octane 2.0 benchmark test and got a score of 9,379. That’s probably about the same as or even a little lower than what a modern $250 Chromebook would score today.
But that’s OK. This won’t likely be a fulltime device for my classmate. She’s just curious about the development experience on Linux as compared to Windows. And this will let her see the difference while also giving my trusty Chromebook Pixel a new purpose in life.
32 Comments
How did you change the Boot Device options in the BIOS for the Chromebook to boot from the memory card? That’s the only step that isn’t explained.
During boot you press escape and you will be given options. Select whatever device you would like to boot from.
Is it possible to open a chromebook and add more storage capacity?
Most if not all of them have soldered on memory, so no.
Yes – the Dell Chromebook 13 (7310) (code name Lulu) is listed on MrChromeBox.tech. It has a removable M.2 Sata SSD – I bought a used Dell on ebay for $35 and i bought a 128 GB M.2 SSD for $45. Having read this artilce I am going to install either Kubuntu or Lubuntu Linux. Another plus for the Dell Chromebook 7310 unlike many, it has backlight keyboard too! –
Happy to report that after removing the “write protect” screw from inside the Dell Chromebook 13″ (7310) & installing a 128 Gb M.2 sata SSD card in place of the 16 Gb OEM, things went very smooth using these instructions. I loaded Linux Kubuntu 19.10. The system is working great thus far. It only has an Intel Celeron 1.5 GHz CPU & soldered 4 Gb RAM so it’s not going to win any speed awards – but for $80 I have a solid little Linux machine resurrected from a Chromebook that won’t recieve Chrome updates after Jun 2021.
If you know someone who works with electronics it is possible to replace or expand storage that is soldered on, however I would not suggest do so unless you know how.
On the Google chrombook pixel 2013 model there is a plastic cellular dummy card. This card is plugged into a mini PCIe slot. This slot will NOT support m.2 drives, however you can get a mini PCIe to USB 3.1 adapter. As I have. Then you can take a low profile 256gb USB 3.1 drive (remove the plastic casing so that you are left with just the USB plug) and most distros of linux can run on it.
Ubuntu doesn’t work out of the box, however Manjaro Gnome works quite well.
Do you know if the “PCIe to USB 3.1 adapter with low profile 256gb USB 3.1 drive” tweak would work with the PCIe slot of the 2015 Google Chromebook Pixel LS model? Do you have any pictures of this enhancement? Links to Hardware? Thanks so much for your time.
I am currently deployed with the US Armed Forces. I have not played around with the 2015 model. Here is a link to the pcie to usb 33 adaptor https://www.amazon.com/Mini-adapter-converter-USB3-0-Express/dp/B07BJ45JXD.
An update to the original post Ubuntu 20.04 works out of box.
Thanks David and thank you for your service! After submitting my Reply yesterday, I looked at some teardowns of the 2015 Pixel and there doesn’t appear to be a PCIe slot available – although I don’t know that for sure. Thanks again.
The original article is about hardware, more than software. Intl i5, OK. Assume it is Ubuntu 19.10 (October, 2019), not 20.04 due in a few weeks, but available as release candidates. Lite all installed Ubuntu systems, it auto-updated its Linux kernel & parts of the operating system.
There are many Ubuntu systems. I think he chose the usual default, with the GNOME desktop environment. In my expert opinion Ubuntu Budgie is best, because it can easily be made to fit the user’s preferences.
Mos users have had experience before: Mac, XP, Windows 7, Windows 1o, etc. Budgie can easily fit these user expectations.
Installed the current stable LTS version which is 18.04. It’s easy to upgrade to 20.04 LTS when that arrives soon.
Did you find all of the hardware works properly? Such as speakers, trackpad, keyboard, Wifi, etc.? Anyone tried this with a Pixelbook? As much as I like the simplicity of a Chromebook it would be nice to utilize the same OS I use on my desktop.
So far, everything seems to be working except for some keyboard shortcuts: volume and screen brightness, for example. But I can change those in Ubuntu as a workaround. Speakers, trackpad, Wi-Fi all working fine.
Sounds good. Ubuntu isn’t the lightest distro either, so you could probably get better performance using something like Lubuntu or another one of the lightweight distros.
The goto OS for old Chrome devices is GalliumOS https://galliumos.org/ which is a fast and lightweight Linux distro for ChromeOS devices based on Xubuntu.
I did this same procedure recently with an old Chromebox and it was great.
Do you think I could do this on my CR-48?
Unfortunately, I don’t see the CR-48 on the list of supported devices for the BIOS firmware flashing.
I owned one of these second hand and sold it. After seeing your article I found one brand new for £260. Annoyingly Goolge have removed the free 1TB for 3 years or it would have paid for itself! You only get 100GB for 1 year now (Google One). There is a great video on youtube that will tell you how to remap the keys and create a custom resolution (native for the Pixel 2013). I also had issues with the headphone jack but is alsamixer you enable the HP/speaker auto detect using M and ti sorted it. Just need to add a script to control brightness of keyboard (there are some on github). I tried ubuntu but have settled on Elementary OS with flathub and terminal loading a few apps. It works really well on this hardware. I wanted a dedicated Linux laptop and you can’t find this quality for £260 new anywhere else!
Hi!
I’m looking to buy one of these, but it doesn’t come with a power adapter, and I can’t find an affordable dedicated one. Could you please measure and tell me what’s the diameter of the power plug?
I’d really appreciate your help.
Cheers,
Arek.
I have the same Chromebook 2013 – from Google IO itself.
I have removed the screw and little copper ring.
I can’t get the Chromebook into developer mode. I boot with Esc and Refresh pushed down – which is tricky because the power button has never worked for me – I close the lid or shutdown to shutdown, and open the lid to power on. But there’s no difference in boot – just just comes up with the normal login screen.
In crosh, shell is an unknown command.
Any ideas please?
Entering Dev Mode on that device requires the power button unfortunately and if yours doesn’t work, I can’t see how you can get Dev Mode.
From the official Chromium page on the OG Pixel: “On this device, both the recovery button and the dev-switch have been virtualized.
To invoke Recovery mode, you hold down the ESC and Refresh (F3) keys and press the Power button for at least 200ms (until the keyboard backlight comes on). If you don’t hold it for long enough, then it won’t work.
To enter Dev-mode, you first invoke Recovery, and at the Recovery screen press Ctrl-D (there’s no prompt – you have to know to do it). It will ask you to confirm, then reboot into dev-mode.”
If you ever want to go back to ChromeOS, Cloudready works wonderfully on this device with the Mr. Chromebook firmware, as well.
anyone have problems with their 2013 Pixel overheating after installing linux (any distro)?
it seems the non-native OS doesn’t have control over the fan or doesn’t bother to turn it on so it heats up really quickly and then has to slow down due to overheating.
I have not installed Linux on a Chromebook, but I have installed a bunch of different distros on various older PCs. There are often cooling issues and lack of fan control. One PC I use now with Linux is annoying because the fan runs constantly at full tilt. The machine runs cool because of this but the noise is loud. In my experience this is one of the biggest issues with uses Linux distros on devices that they were not designed for. Not only cooling systems, but all sorts of peripherals are often problematic: scanners, webcams, printers, etc.
You are correct. Linux kernel 5.3+ has this bug where it keeps the fan at idle all the time and overheats the device. You can rollback to mainline 5.1.x or earlier to fix that + no suspend bug.
Ubuntu works well for the most part but the latest kernel (anything above 5.3) ships fresh with both no suspend and no fan bug on Chromebook Pixel 2013 [link], therefore kernel roll back is necessary! You also need some extra setup to get the trackpad scroll speed & gestures right. I’m currently doing writeup of my own and I’m pretty happy with my setup right now. I’ll link the post here once it’s finished
Did everything work?
Windows No touch screen, no track pad and tray volume don’t work.
Elementary OS Everything works so far except Headset jack output.
I would like to get everything and I can live with no trackpad.
Ubuntu didnt have proper driver for my touch screen, touchpad and keyboard backlight.
This is a great tutorial! I’m going to try this on my old Chromebook Pixel.
When I tried this I got only as far as downloading the OS Utility Script but just got an error message saying “Downloading supporting files…
Required package ‘dmidecode’ not found; cannot continue. Please install and try again.”
Is that step even necessary?