Network-based Chromebook recovery is a built-in feature that lets you restore your device without external tools like USB drives or cables. Introduced in ChromeOS 101 for devices launching after April 2022, this method downloads and installs the recovery image directly over your internet connection.
You might need this feature when your Chromebook won’t boot properly or has serious software issues. Instead of creating a recovery USB on another computer, you can fix your device using just a Wi-Fi connection.
This guide walks you through the entire recovery process using your network connection.
How to use network-based Chromebook recovery
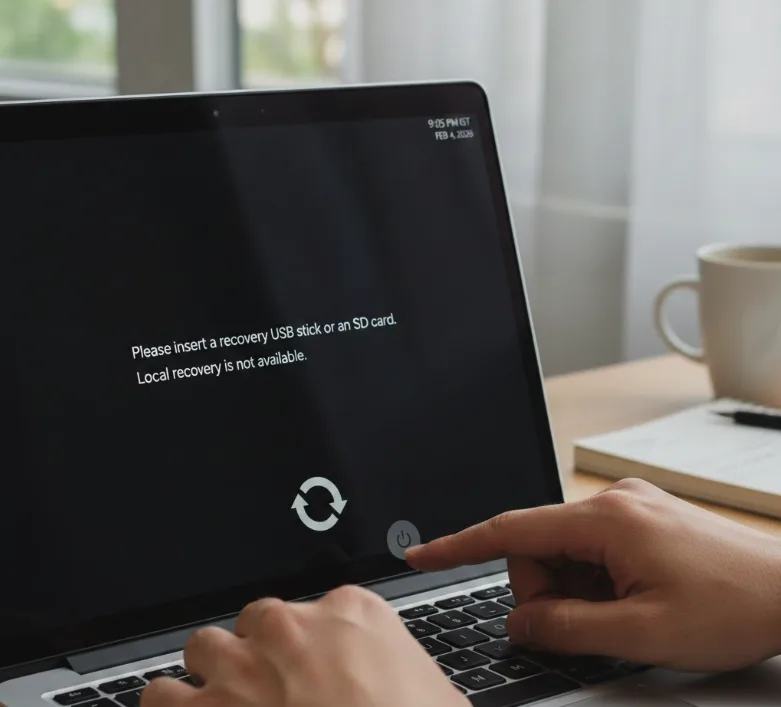
Enter recovery mode on your Chromebook
Hold down the ESC key and the page reload key together. While holding both, press the power button.
Release the power button but keep holding ESC and page reload until text appears on your screen.
Some Chromebook models use different key combinations. Check Google’s support page if this method doesn’t work for your device. The refresh button on your Chromebook is typically located in the top row of your keyboard.
Check if your device supports network recovery
Once in recovery mode, look at your screen. Devices with network recovery support will display an option labeled “Recovery using internet connection.”
If you don’t see this option, your Chromebook launched before April 2022 or doesn’t support this feature. You’ll need to use the traditional Chrome OS recovery method with a USB drive instead.
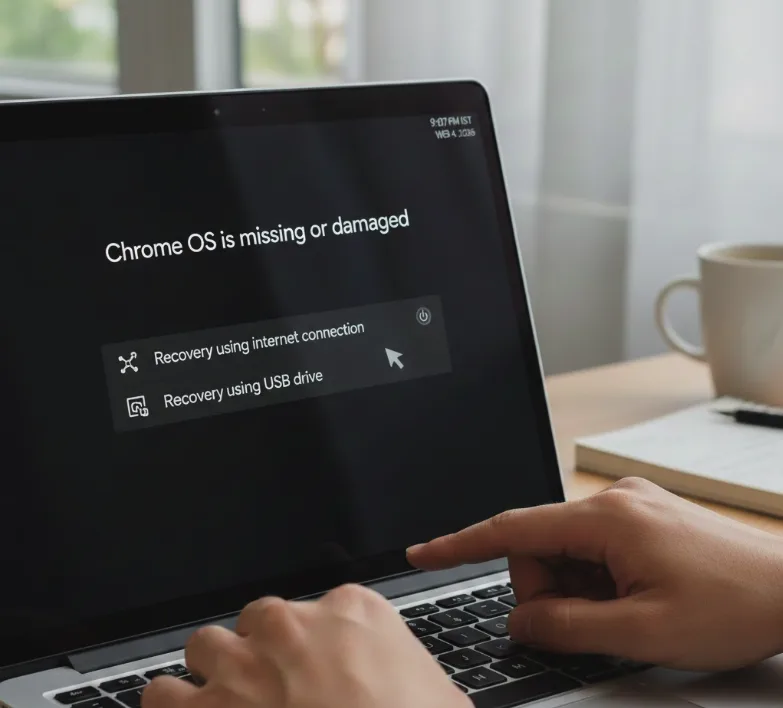
Select the network recovery option
Click “Recovery using internet connection” on your screen. The next screen will prompt you to click “Next” to continue.
Your Chromebook will then ask you to connect to an available network.
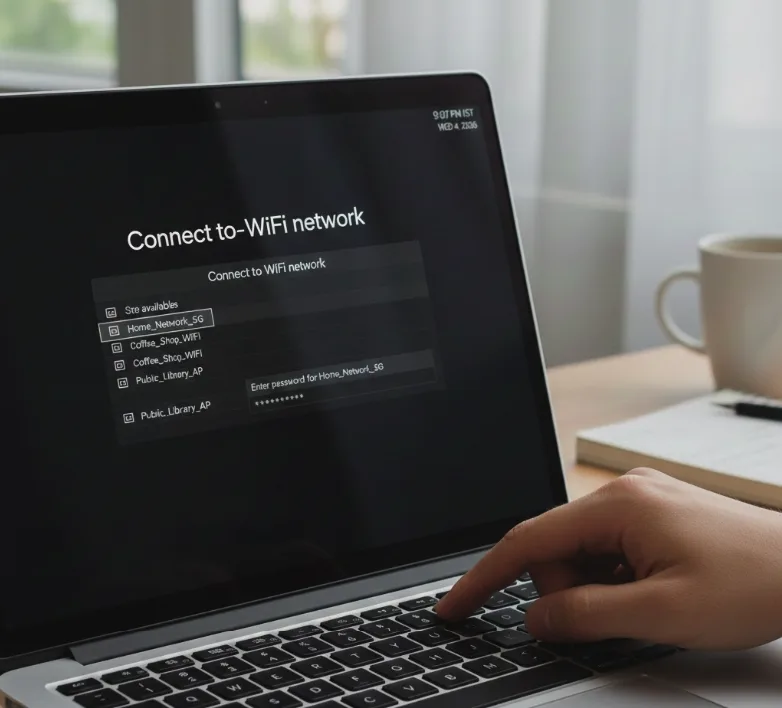
Connect to your Wi-Fi network
Press ENTER on your keyboard to view all available networks. Use the up and down arrow keys to navigate through the network list.
Press TAB to move between different interface elements. Press ENTER to select options.
Choose your Wi-Fi network from the list and enter your network password when prompted.
Wait for the recovery process to complete
The recovery tool downloads the correct ChromeOS image based on your device’s hardware data. You don’t need to specify your Chromebook model.
The download and installation time depends on your internet speed. A fast connection might complete the process in three to five minutes.
When finished, you’ll see a “Recovery Complete” message. Your Chromebook will restart automatically and appear as a new device.
The network recovery process runs entirely on its own once you connect to Wi-Fi. Your Chromebook selects the appropriate recovery image and handles the installation without additional input. Before starting recovery, consider backing up important files to Google Drive to prevent data loss.
FAQs
What Chromebooks support network-based recovery?
Devices launching after April 20, 2022, typically support network recovery. Enter recovery mode to check if your device shows the network recovery option.
Do I need a USB drive for network-based recovery?
No USB drive is needed. Network-based recovery downloads the recovery image directly over your internet connection without external storage media.
How long does network recovery take?
Recovery typically takes three to five minutes on a fast internet connection. Slower networks may require ten to fifteen minutes for the complete process.
Can I use mobile hotspot for Chromebook recovery?
Yes, you can connect to any available Wi-Fi network, including mobile hotspots. Ensure your connection is stable throughout the recovery process.
What happens if network recovery fails?
If network recovery fails, you’ll need to create a USB recovery drive on another computer. You can also try a factory reset if the device still boots into ChromeOS.