
Linux on Chromebooks officially arrived with Chrome OS 69 last year, so the feature has been available on supported devices for six Chrome OS versions now. It’s still gaining features and fixes but at this point, many people who may have never used Linux in the past have the option on their Chromebook.
So where does one start with Linux on a Chromebook?
I’ll be writing up a series of posts to help answer that question, starting today with the basics of the Linux command line. You may not need all of these commands as Linux becomes even more integrated with Chrome OS, but they’re good to know regardless. In the future, I’ll share some more advanced useful Linux features, some of the apps you might want to use for certain instances and more.
To level-set everyone, here’s a high-level explanation of what you actually have – and what you don’t – when it comes to Linux on a Chromebook.
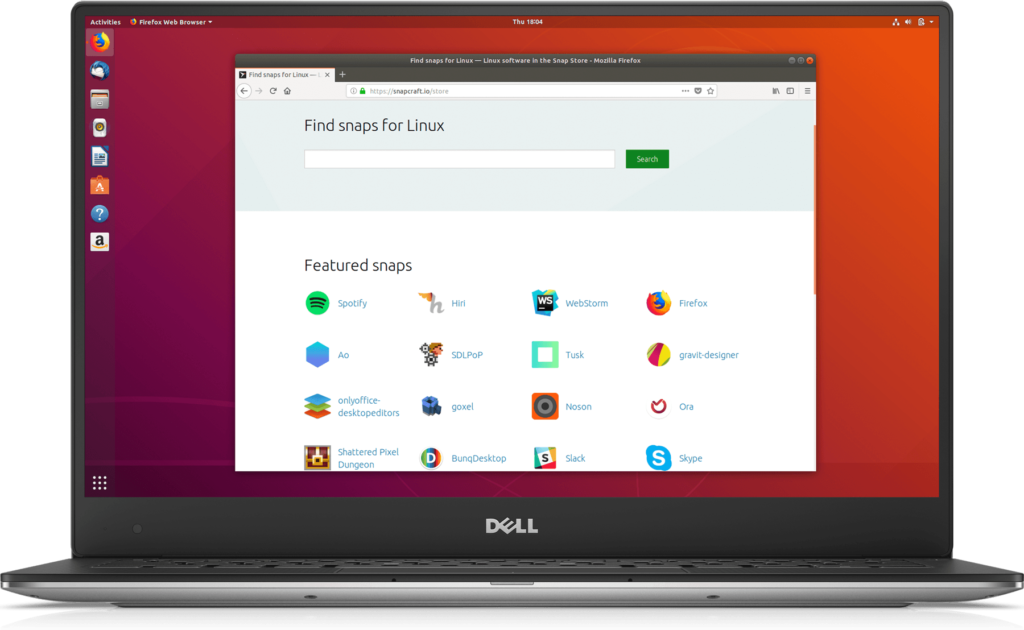
When most non-Linux users think about the open-source platform, they imagine something that doesn’t quite look like Windows nor macOS but can be similar. Perhaps it’s something like this:
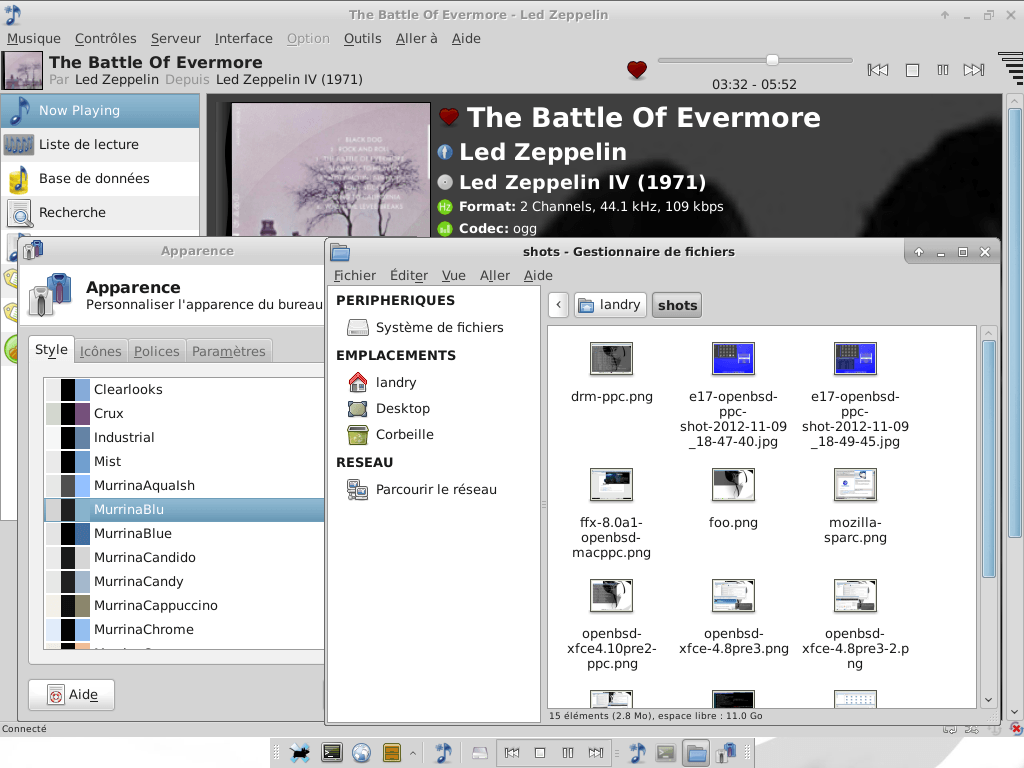
Or maybe it’s like this:
Or even this:
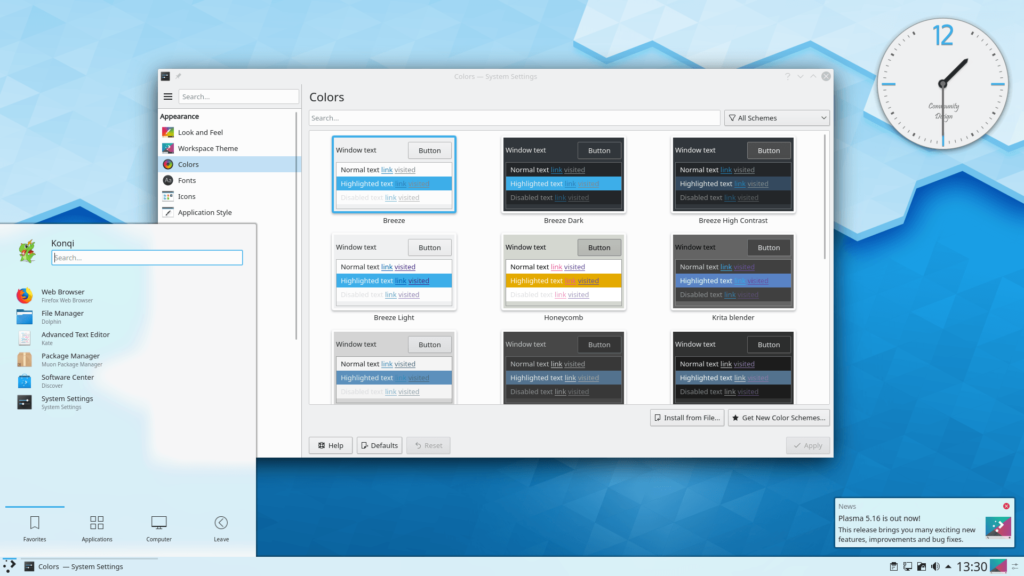
My point here is twofold. First, there are several top-notch graphical user interfaces for Linux systems. And second, you’re not getting any of them with Linux on a Chromebook. Instead, you get… this:
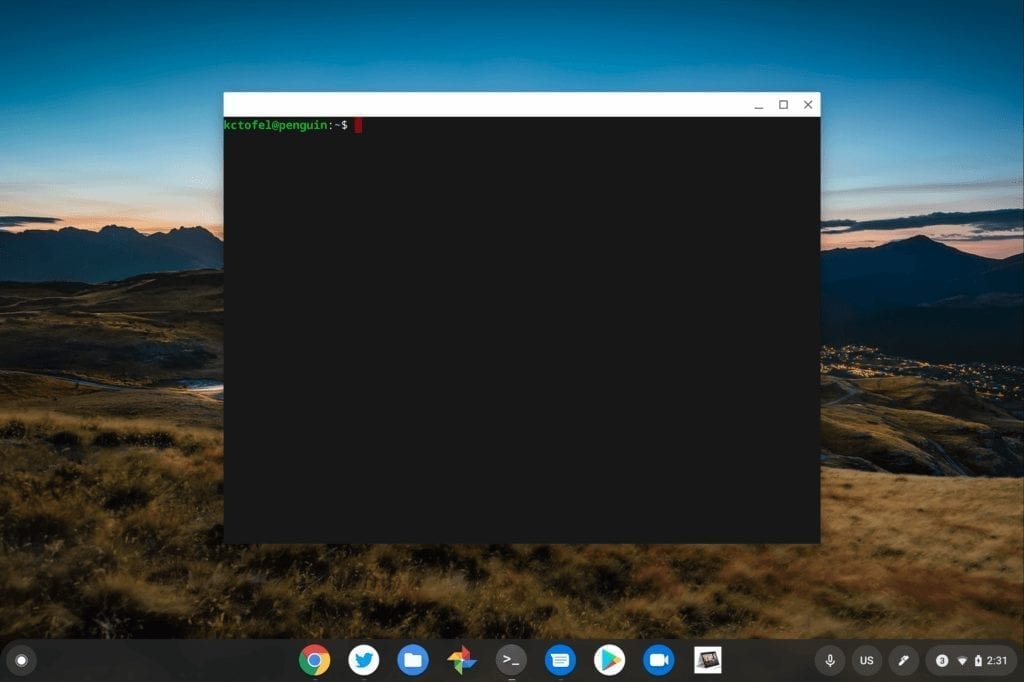
Feeling let down? I get it, but don’t worry: Traditional graphical-based Linux apps will run just fine on a Chromebook; I use several to code, for example. And there are ways to completely avoid the dreaded command line interface provided with the Chrome OS Terminal app. Even so, there are a few basic Terminal commands that you should probably know.
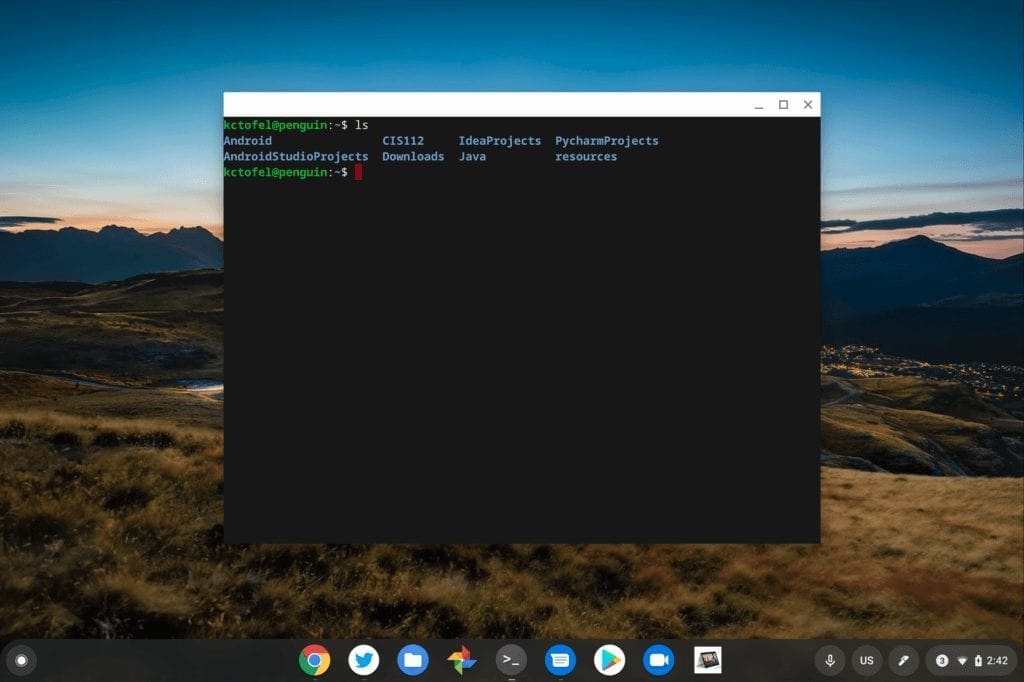
To see what’s stored on your Linux “drive”, you’ll want to know the cd and ls commands. “cd” stands for “change directory”, so without a graphical file manager, it’s how you navigate to different directories and folders in Linux. (Don’t worry if this sounds daunting: You can navigate and manipulate Linux files to some extent directly in the Chrome OS Files app). And the “ls” command lists what files and folders are in your current directory.
Here I’ve typed the ls command in my Terminal app and it shows the eight folders I currently have in my home directory. Bonus tip: Folders appear in blue while regular files appear in white.
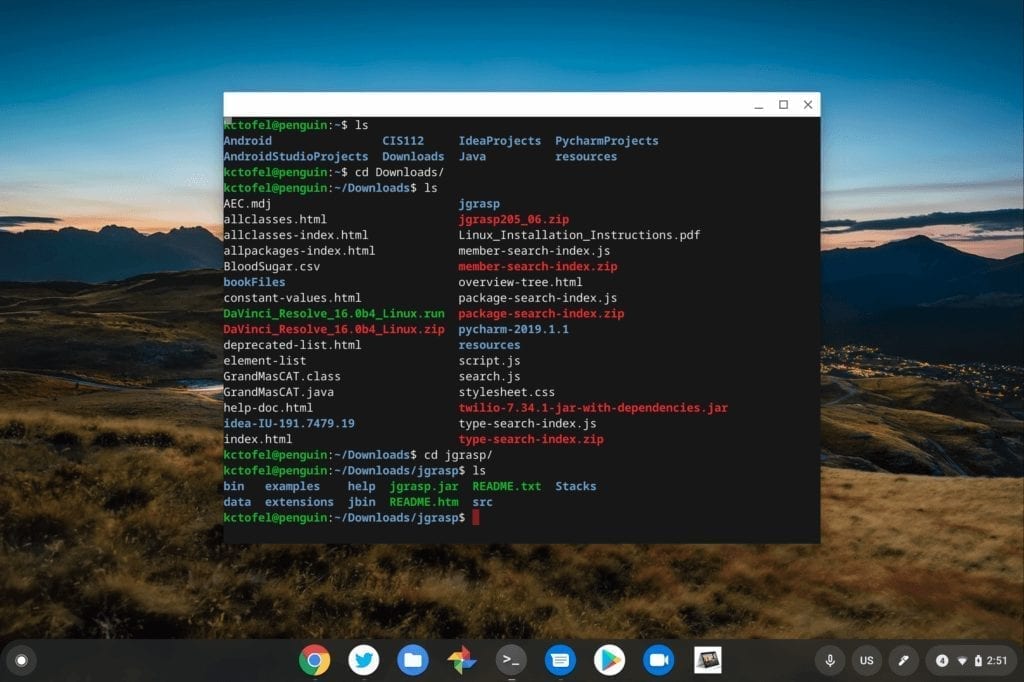
Now that I can see my Linux folders, the cd command is used to navigate to one of them. In this case, I typed cd Downloads/ followed by the trusty ls command to list the contents within my downloads folder.
Second bonus tip: You often don’t have to type the full name of a file or folder; just type the first few letters and hit the Tab key on your keyboard for auto-completion. I typed cd Do and hit Tab in the above case. Here are the results:

Note that there are a bunch of regular files (in white), a few compressed files (in red), and even five sub-folders. For me to get into one of those sub-folders, I use the cd command again: cd jgrasp will move me into my jgrasp folder and the ls shows what’s there:
From here, I can run the appropriate command to start my jgrasp app to code in Java, but let’s not get ahead of ourselves.
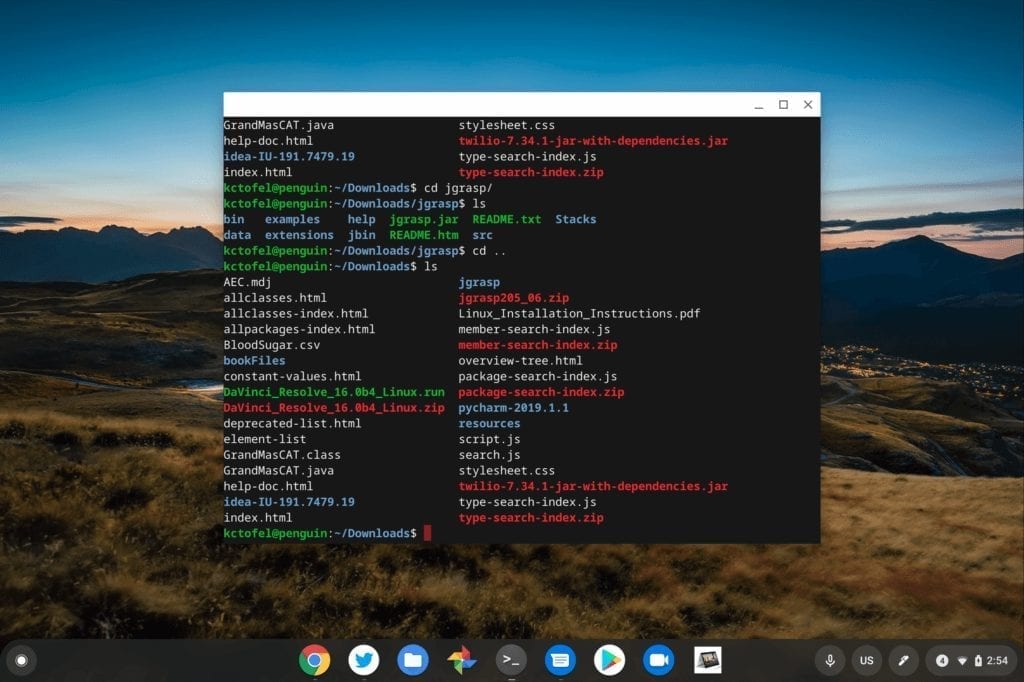
The real question is: How do we move back up from a sub-folder?
That’s just a small addition to the cd command: Type two periods after cd and you’ll move back up one folder level.
If you know exactly which directory you want to open, you can also just type it after the cd, although I didn’t do that in this case. Here I’ll jump back up a level my Downloads folder and then show the directory contents with ls:
With these two basic but powerful commands, you can navigate around your data files in Linux. Again, you can view these in the Files app of Chrome OS or you can even install a graphical file manager interface, but we’ll go over that in the future.
There’s one more set of useful commands to make sure your Linux environment is up to date, as well as to install apps if you choose to do that from the command line. In some cases, you can just download an app, or package, in Chrome OS and use the Files app to install it. However, that’s not always the case.
All of the following commands are part of the Advanced Package Tool, or apt, included with Linux on a Chromebook. There are a bunch of commands but I’ll cover the few that will get you going.
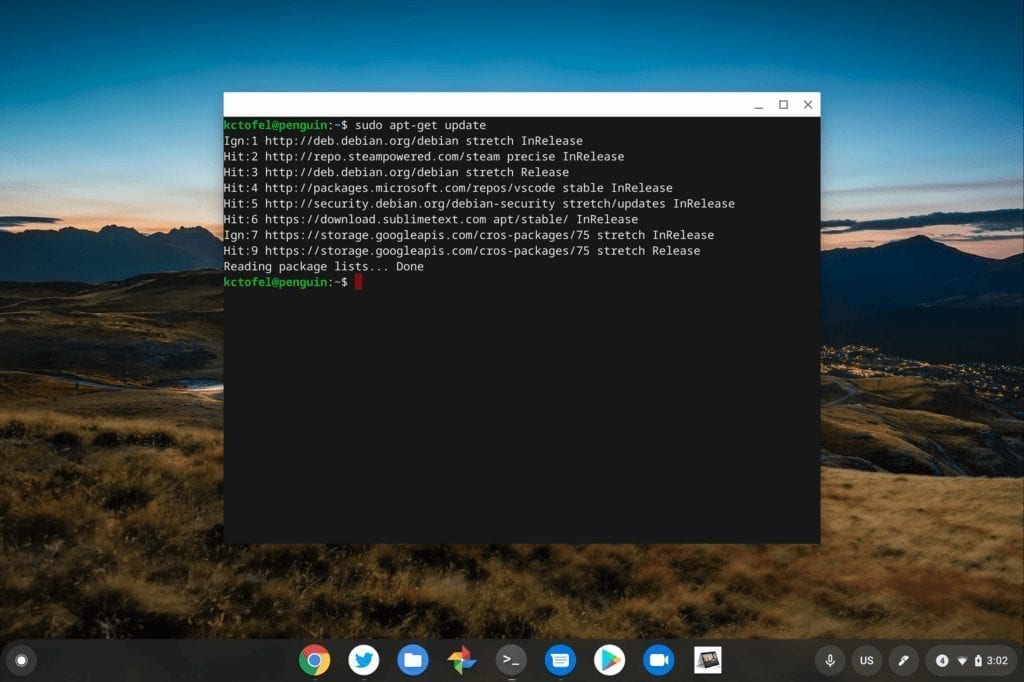
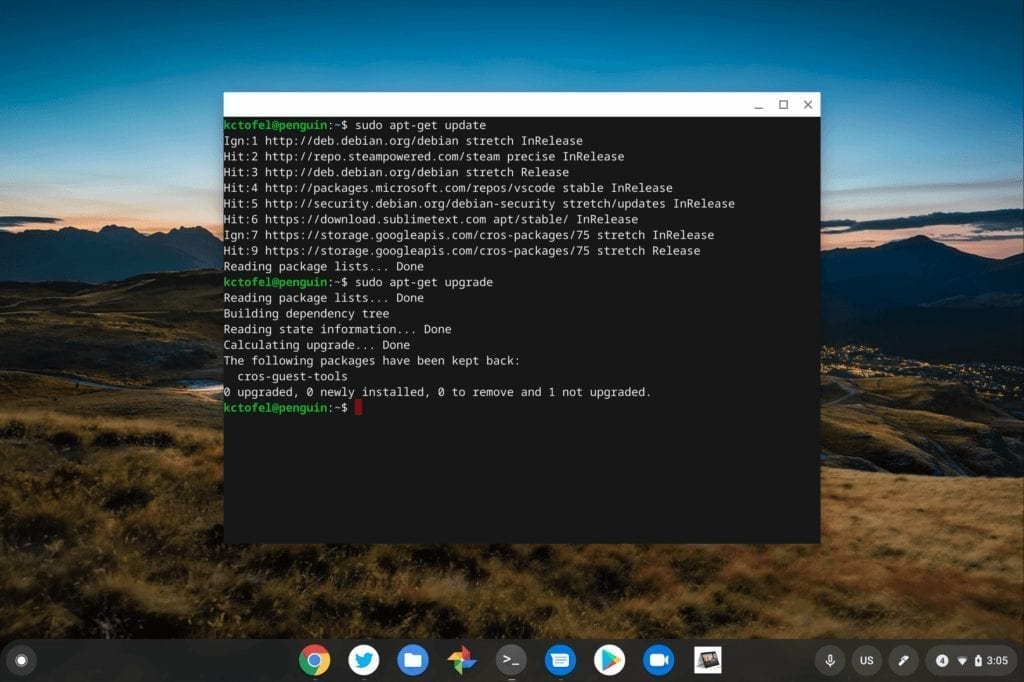
The apt-get update command will check your Linux files for any updates or patches. Note that you’ll have to first type sudo, which stands for “super user, do”, i.e.; you’re essentially running the command as an administrator.
Here’s what it looks like on my Chromebook after checking for updates:
After checking for updates, the apt-get upgrade command (again with sudo in front of it) will download and install them.
In my case, there aren’t any updates available; if there were, the Terminal would show the total file sizes of the updates and prompt me to install them by typing a Y.
Lastly, at least for basic use, the apt commands can be used to download and install Linux apps on your Chromebook. For this example, I’ll download a version of that mathematics puzzler, 2048, which is a game I still love to play. I can install it by typing sudo apt-get install 2048-qt. Essentially the “install” part tells Linux I want to install something and whatever is after that is the name of the app, or package, to install.
You can view all of the apps that Debian Linux – which is the version that comes by default on a Chromebook – manages on the Debian website here. Of course, you can search for any Debian-supported Linux apps as well on the web.

After running the installation command, Linux tells me the size of the download and installation, prompting me to type Y if I want to install. Which I do.

After typing Y to continue, the files are downloaded and installed. Success!
But wait, how do we actually run it? All I have to do is type the app name, regardless of what directory I’m in, which in this case is 2048-qt. Boom!

That’s a little knowledge to get you started with Linux on a Chromebook. And if you want to learn more about any Linux command, you can usually type “help” after it. Here’s an example after typing apt help:

There’s much more to learn, of course, and if you’re interested, stay tuned for additional posts in this series. If you have a specific Linux command, app or function you’d like to know about in the future, please don’t hesitate to mention it in the comments.
Next time around, I’ll call attention to some Linux applications that either don’t have a solid Chrome OS equivalent or might be better for some people than a web-based app.
24 Comments
This kind of info is appreciated. Please continue the series.
You intermixed apt and apt-get in your article. Either make it clear that for the most part, they are both equivalents or just use apt since it is the newer command and in some ways far more powerful.
Thanks Kevin!! My retirement present (to myself) will be a nice 2 in 1 chromebook. Will definitely give Linux a try. Reminds me of the DOS prompt from may years ago. Looks like a fun hobby.
Also want to be able to work on a larger screen at my desk when I retire the old Windows PC. Anyone able to recommend a nice hub that can drive an external monitor, connect to a keyboard/mouse/speakers, charge the chromebook and charge an Android phone?
Since January, I’ve been using a USB-C hub that meets most of your requirements: support for external monitors over HDMI (audio and video), USB keyboard & mouse, power delivery to a Chromebook and charging a phone or tablet. It also has a memory card reader. There’s no 3.5mm audio out function but again, HDMI can deliver sound if that works for your set up: https://45-56-100-85.ip.linodeusercontent.com/news/the-best-home-and-travel-accessory-for-my-pixel-slate-is-this-usb-c-hub/ There are other variations of this hub so maybe there’s a better one for your specific needs.
Thanks Kevin! I’ll have a look. Your commenters on that older post also provided some useful advice.
This is great! Thank you, Kevin.
Great idea. Thanks for the starting this. Any idea when audio features will align with Audacity so you can edit audio/podcasts?
Thanks! I haven’t seen any progress on the audio recording lately but I’m very interested in that feature since I record two shows a week. Have an old Mac that is solely used for audio recordings and I can’t wait to be rid of it.
Audacity is apparently available in Linux (https://www.techradar.com/news/best-linux-apps), so I don’t understand Steve’s question. I’m assuming you can use Audacity to record through the Chromebook mike or a USB mike. What am I missing?
Yup, I’ve had Audacity installed on my Chromebook for months. However, Linux on Chrome OS only recently gained the ability for audio playback and the team is still working on audio recording. Any time Linux is going to access Chrome OS hardware, it has to be done securely, so not all Linux features work with Chrome OS right away.
So you can’t you use an Android voice recording app and edit the file in Audacity?
Perhaps. Might be tricky since I also use Skype to talk to my co-host. At this point, I’ve waited a year for a native, integrated solution that I’ve been using for podcasts since 2006. I can wait a little longer. ?
I keep telling myself, “if I was going to learn Linux – I should have started ten years ago”. Thanks to your help perhaps this is the time I will try. I will be reading each article with much interest.
So, IF the vaunted “security” that Crostini gives you is only of marginal importance to you, as it is to me, Crouton ALREADY delivers everything (or if it is not “everything” it is darn near everything) Linux on a Chromebook, while Crostini users are waiting for years for one feature after another to be implemented. I have been using Audacity to record and play audio for a couple of years on a succession of Chromebooks (I am on my third one now, a 64 GB Asus Flip C302, because I kept bumping up against the limits of the 16 GB drives). I might move to Crostini once it is “finished” but, for now, Crouton is MILES ahead of Crostini.
And, so it seems, Crouton is ALL I can run on my Asus Flip 302ca. Although it is a very well-reviewed Chromebook, and deservedly so in my experience, the Crostini team has not gotten around to adding this and several other higher-end Chromebooks to the project. The issue has been “starred” 464 times in Chromium bugs, with no response from the developers.
https://bugs.chromium.org/p/chromium/issues/detail?id=918312&q=owner%3Adgreid%40chromium.org&colspec=ID%20Pri%20M%20Stars%20ReleaseBlock%20Component%20Status%20Owner%20Summary%20OS%20Modified
Great info!
The best part is not having any gnome or kde or xfce. I’ve been distro surfing linux for years, searching for a stable desktop. I finally found it when I installed the cloudready version of chromeos. It’s the best of both worlds – the power of linux and a great desktop environment. It’s totally isolated, so no mater what I do in linux, it doesn’t beak my deskop. The first 2 times I tried to upgrade crostini to use debian buster, I messed it up, but I could start over without losing my desktop.
More articles like this would be very helpful, there is not a lot of documentation on using this feature. I’ve gotten feedback from the chrome community asking why I even try – that linux on chrome is some kind of abomination. It’s nice to hear that other people actually agree with me.
hi! I’m having a little trouble saving files on linux beta terminal. I have no idea what the command is, and google doesn’t do the best at explaining things in simple terms. Any Idea?
Thank you for my very first “Lesson in Linux”. After 9 yrs. of disability by construction, I’ve come to the hard truth that I won’t be building bridges or skyscrapers but I could learn to build something useful with linux! a
Again thanx.
Happy to help, Tony. With Linux, the sky’s the limit! (no pun intended) Cheers!
how do you instal crouton? i want to be able to use external drives like cd rm stuff like that
All of the installation instructions and files you need are here: https://github.com/dnschneid/crouton
I believe Crouton is currently broken, and following the installation instructions on Github will fail to install a working “chroot” (the Crouton container for installation of an Ubuntu version). I have posted my recent experiences in the Google group Crouton Central. I have been a Crouton user (and cheerleader) for years, and am a bit dismayed. At least one of the Crouton contributors reads and responds to posts on Crouton Central. If anyone has currently succeeded in installing Ubuntu with Crouton, please post on Crouton Central
Hi, Thanks for this. I’m all set up, but can not longer use the search keys and (minus key) and (plus key) for F11 and F12. Any tips on how to access these function keys?