How to screen capture a full webpage on a Chromebook
Earlier today I had to file a DMCA takedown request for a site that republished some of the content from this site. All of the links and images were stripped and the copy seemed to have run through a bad rewording script or app. For my records, I wanted to capture a full webpage on a Chromebook. Otherwise, I’d have to capture each visible screen section piecemeal. Here’s how to capture a full web page on a Chromebook, which is actually easy to do.
Open Developer Tools
The Developer Tools of your browser lets you capture a full webpage on a Chromebook. So first you’ll browse the website or page on your Chromebook. I’ll use Techmeme.com as an example.
Then, on your keyboard, type the CNTL + SHIFT + I shortcut; that last bit is a capital letter I, as in “Ice”. This shortcut opens Developer Tools:

Use this shortcut
Next is another keyboard shortcut. This time it’s CTRL + SHIFT + P, which quickly gets you to a search box for various developer needs. Once you have that search menu open, start typing “screen” to see the below options.

As shown above, I’ve highlighted the option for a full-size screenshot capture. That’s the one you want to click. Once you do, a PNG file will be saved to your Chromebook in the Downloads folder. That PNG file is a full-length screenshot of the website or page.
View and save your capture of a full website on a Chromebook
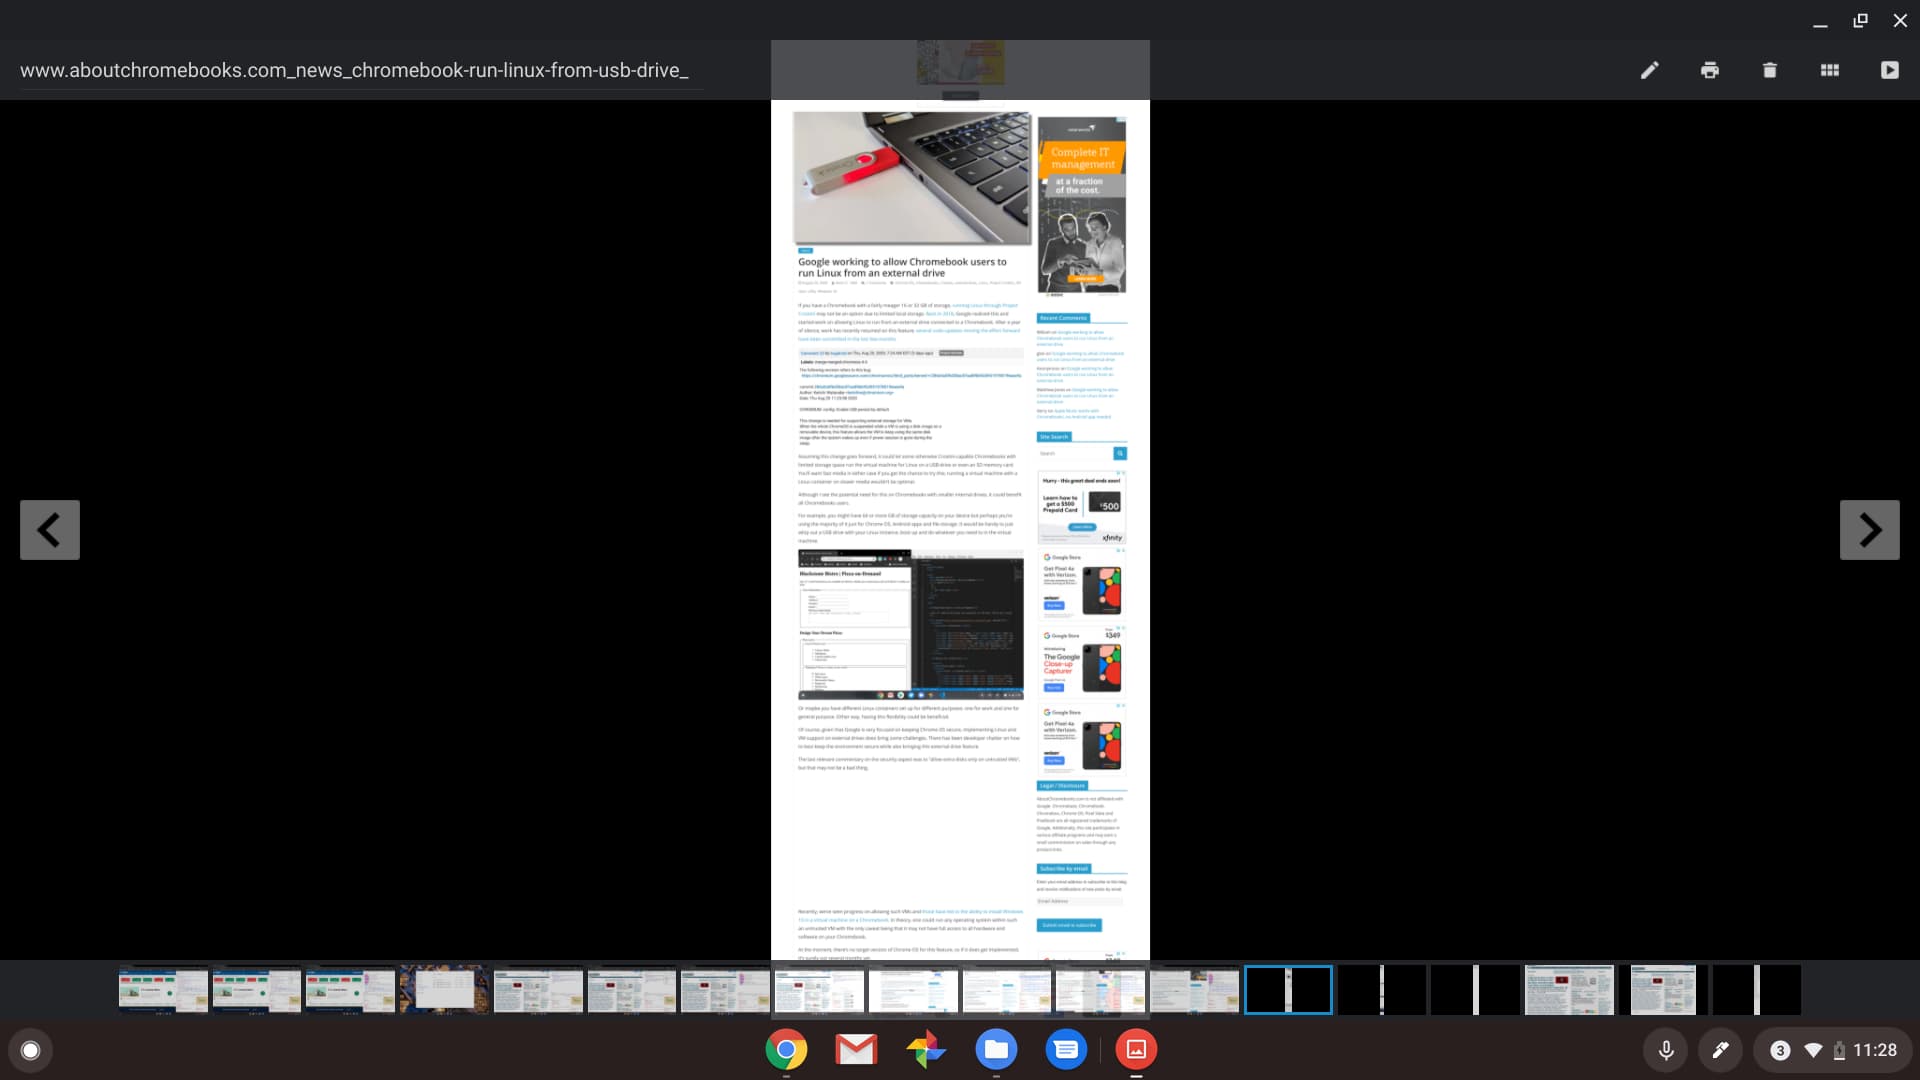
There is one tricky bit though. Viewing that long PNG image in the standard native image viewer of Chrome OS really doesn’t work. It won’t let you zoom in enough to actually read anything. This is the most I can zoom in on with my example.

However, there is a way to view the entire screenshot by scrolling around; it requires Google Drive. I saved the PNG file in my Google Drive using the Files app. I then navigated to drive.google.com and opened it. Viewing your image file this way you can actually zoom and scroll around with all of the text legible.
It’s a bit of a hack, yes, and there are Chrome extensions that can capture a full webpage on a Chromebook. I personally prefer to use native tools and features when possible so this is my method.
Note that if you just want to capture the viewable screen of a webpage, there are two simple ways to do this.


Very cool.
You could just say “Hey Google, Take a screen shot. C
Wow.
Thats a lot of effort with few options.
I use Nimbus for many years now.
Its fantastic.
I came here expecting this to be a review confirming Nimbus but alas no.
Hope you can do a follow up review of it.
https://chrome.google.com/webstore/detail/nimbus-screenshot-screen/bpconcjcammlapcogcnnelfmaeghhagj
The “Save to Google Drive” extension, by Google and in the web store, does this with one click. A site devoted to Chromebooks should know this basic functionality.
Yup, I’m aware of that, and other, extensions that can accomplish the same thing. That’s why this is in the article: “… there are Chrome extensions that do the same thing. I personally prefer to use native tools and features when possible so this is my method.”
Just providing another option here. Cheers!
Or, click on 3 dot menu upper right, select more tools and “take screenshot”…….does this person even own a chromebook or ever took a screenshot before ???
Yup, I own several Chromebooks and take screenshots daily. That’s how I know the method you described doesn’t capture a complete web page image. It only captures the viewable screen. 😉
Thanks for the instructions, Kevin. Nice to see that there is a native option; I use SnagIt on Windows and love its scrolling capture option. Just recently started using Nimbus extension. Is there a native screen _recording_ feature? Before Nimbus, there were not many good options there.
Nearly a year-and-a-half later, maybe nobody will see this, but I tried Kevin’s Kool native solution, and discovered that now you CAN just click on that saved screen shot (from “Tote” or go to downloads) without going through the extra step with Drive, and zoom in and move around the long page image.
*I* saw it: very KOOL indeed! 🙂
Me, too! 🙂