
I always carry a USB drive with me, just in case I need to recover a Chromebook I have. What if you don’t have any storage media to create a factory image? Chrome OS 101 enabled Chromebook recovery over a network, although it’s limited to new devices. Here’s how to use the network-based Chromebook recovery.
Make sure your Chromebook supports network-based recovery
When Google introduced this feature in ChromeOS 101, it highlighted that most newer devices would support it.
Network-based recovery provides a built-in recovery mechanism for Chrome OS that doesn’t need external tools such as a USB stick, an Android device, a second computer, a USB cable, and so on. It is available on most of the new Chrome OS devices launching after April 20, 2022.
Right off the bat, if your Chromebook launched prior to this past April, you’re probably out of luck. However, you can check by entering recovery mode.
Typically, you hold down the ESC and the page reload key, then press the power button of your device for this. Let go of the power button and hold the other keys until you see text on your display. Some ChromeOS devices use an alternative method to enter recovery mode. You can find them all on Google’s support page.
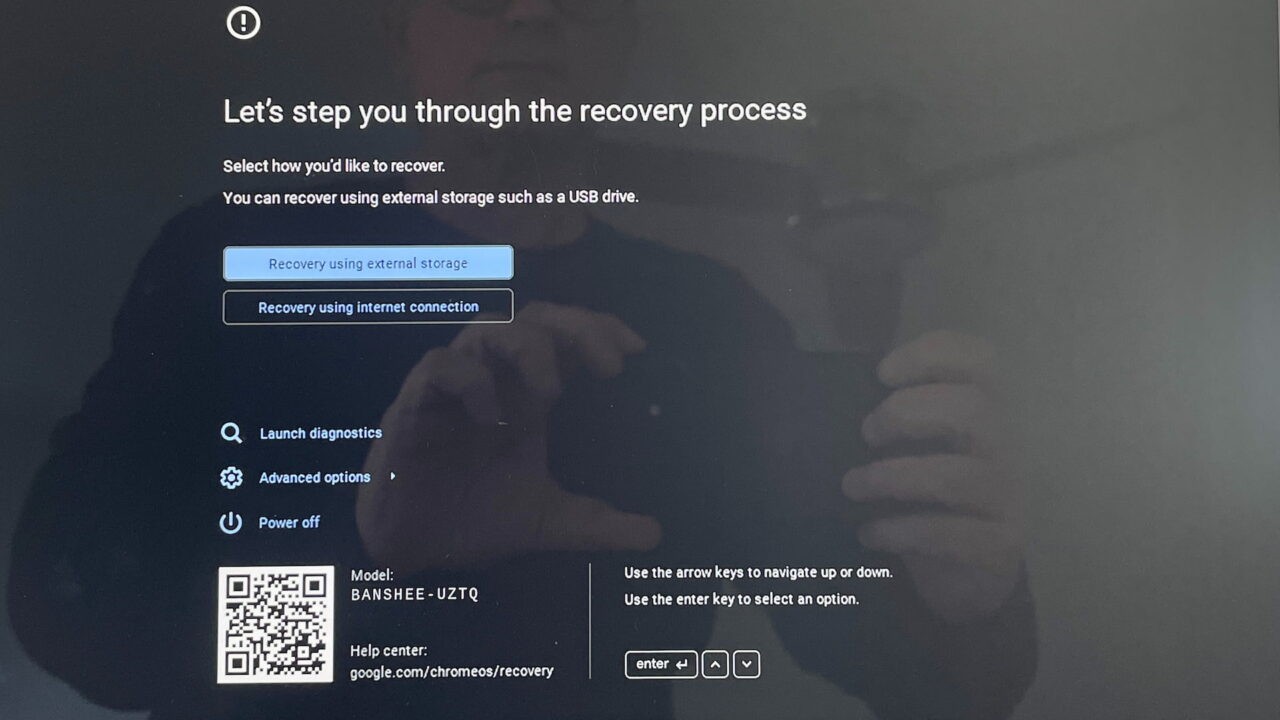
If your device supports network-based recovery, you’ll see this screen:
If not, I hope you took my advice and carry some removable storage media with you. You’ll need one to use the old recovery method.
Choose to recover using internet connection
Assuming you have the new method, click on “Recovery using internet connection”. That should bring you to a screen where you can click “Next” to proceed. You’ll then be asked to connect to an available network:
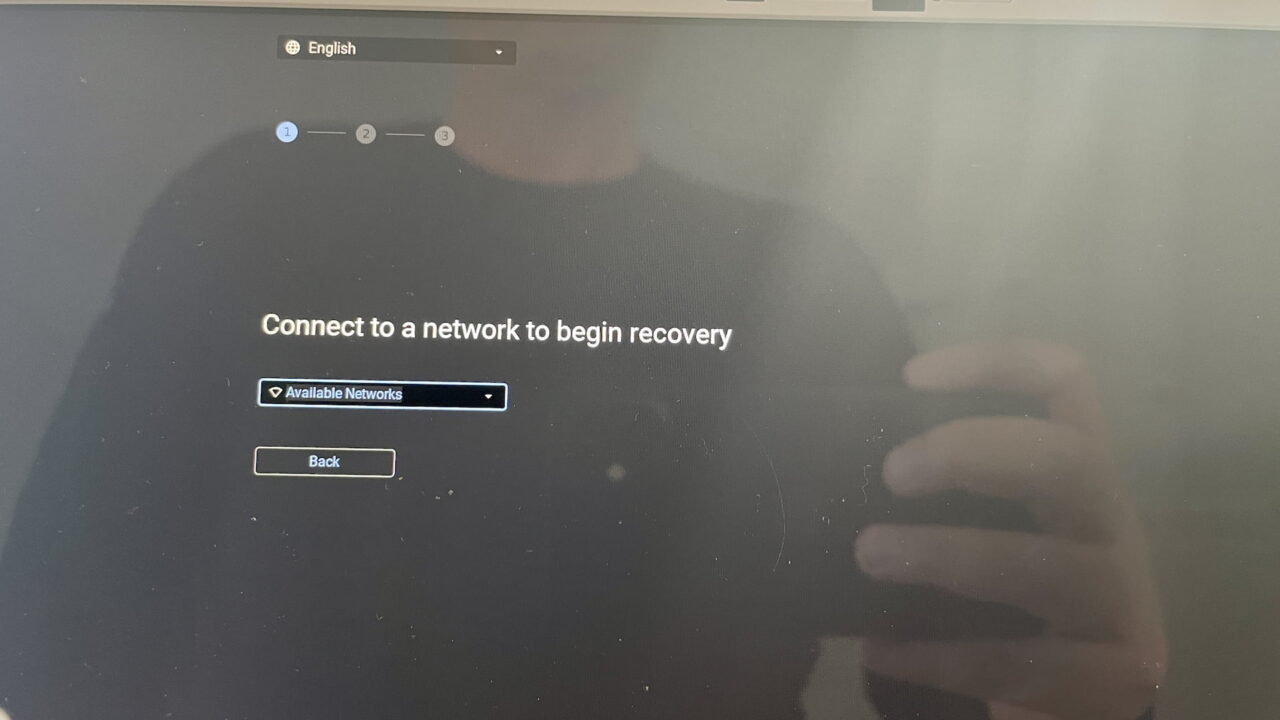
From here, you can tap the ENTER key on your device keyboard to see all available networks. Note that this interface requires the use of the up and down arrow keyboard keys, the TAB key, and the ENTER key.
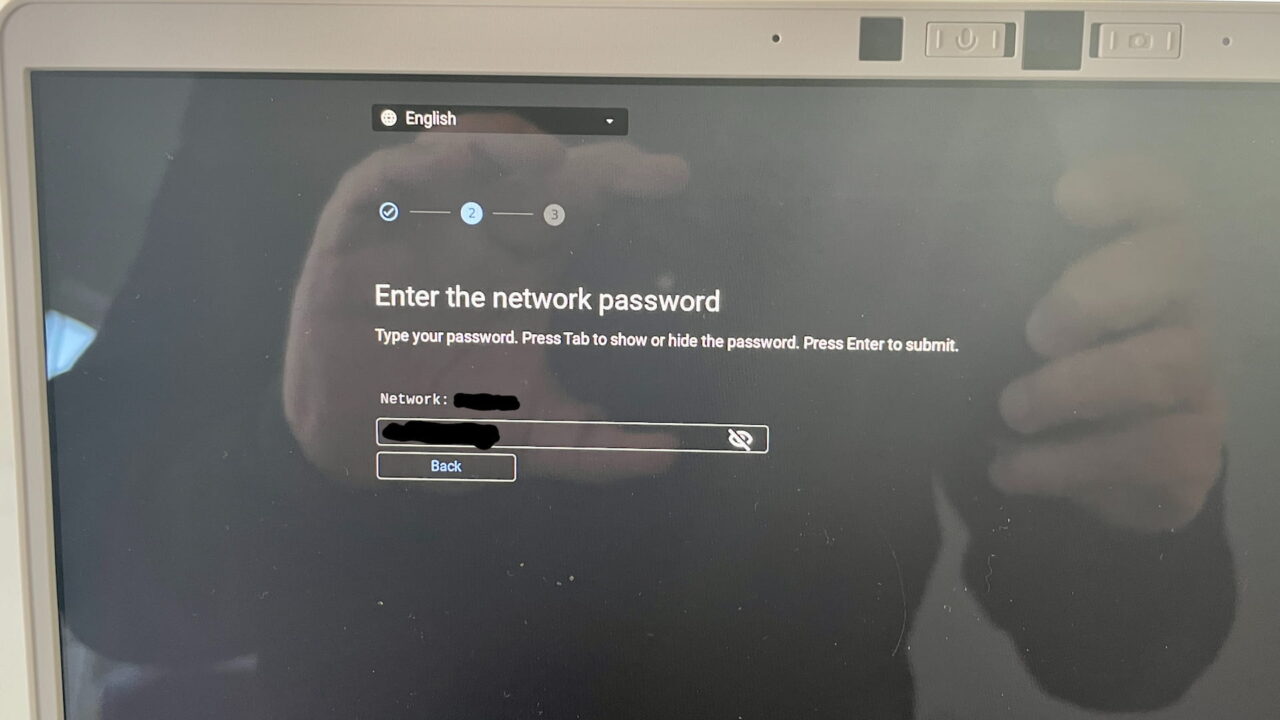
Select a network you can connect to, and enter the network password. Here I’ve done this step on my home network:
Let the network-based Chromebook recovery do its thing
Assuming you have a stable network connection, the recovery tool will download and install the proper ChromeOS image to your Chromebook. You don’t have to select what Chromebook model you’re recovering. This tool reads the hardware data of your Chromebook to get the right ChromeOS image.
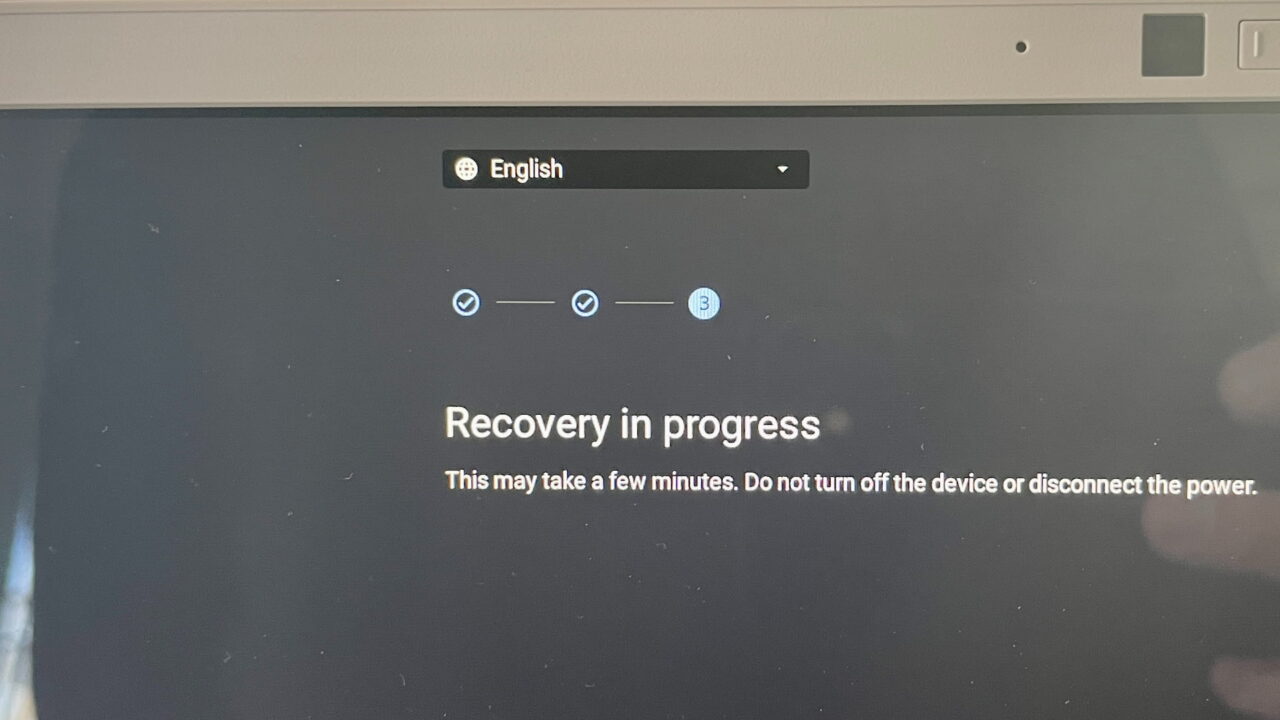
I have a relatively fast home internet connection of 1 Gbps with about 50 devices on the network. The network-based Chromebook recovery tool took about three minutes to download and install the recovery image. At that point, I received a “Recovery Complete” message. And a few seconds later, the Chromebook restarted as if it were new.
It is a downer that the network-based Chromebook recovery tool works on fairly new devices. Once you have a Chromebook that supports it, however, it’s a simpler process to follow. And you can stop carrying a spare USB drive with you after that. But I still might. 😉
1 Comment
Thanx for covering this method, I had wondered how it would work and, as mentioned, only some of the latest Chromebooks can implement it.
It would sure make things a lot easier if they can roll this out to more Chromebooks, I think it just takes adding a USE flag when building the image that would place the MiniOS on currently unused partitions 9 & 10.
https://sites.google.com/a/chromium.org/dev/chromium-os/chromiumos-design-docs/disk-format#:~:text=the%20entire%20drive.-,GUID%20Partition%20Table%20(GPT),-The%20second%20sector