Chromebooks now support microphone audio capture in Linux containers, a feature that arrived quietly in Chrome OS 79. This capability lets you record audio using your Chromebook’s built-in microphone or an external USB mic within Linux applications.
The feature enables podcasters, content creators, and developers to use audio recording software like Audacity directly in their Linux environment. You no longer need to switch between Chrome OS and Linux for audio tasks.
Right now, you need to manually enable this through a command line process. The feature hasn’t reached the experimental flag stage yet, so you’ll use the crosh shell to activate it. Once enabled, your Linux apps gain full access to your microphones.
Microphone audio capture arrives in Linux on Chromebooks. Here’s how to use it?
Follow these steps to enable microphone audio capture in your Linux container on a Chromebook.
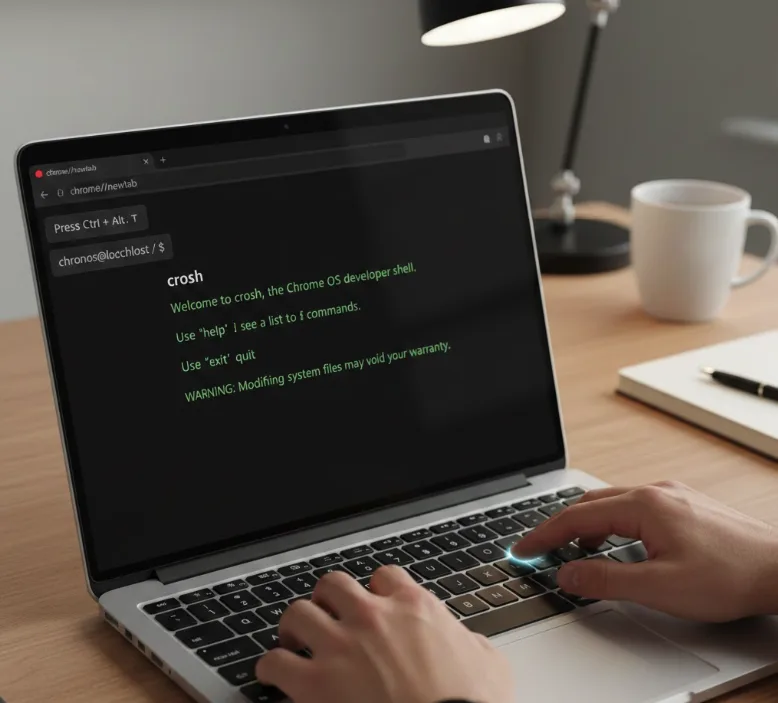
Open the crosh shell
Press Ctrl + Alt + T in your Chrome browser. This opens the crosh shell, Chrome OS’s command line interface.
The crosh shell provides access to various system commands and diagnostics for your Chromebook.
Stop the running Termina VM
Type vmc stop termina and press Enter. This shuts down any currently running Termina virtual machine where your Linux containers operate.
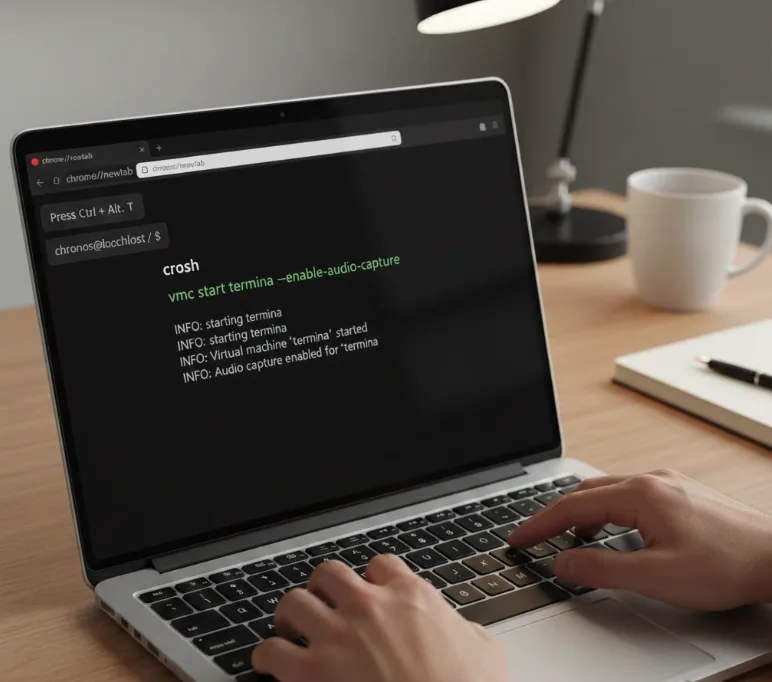
Restart Termina with audio capture enabled
Enter this command: vmc start termina --enable-audio-capture and press Enter. This restarts your virtual machine with microphone support activated.
Launch your Terminal app
Open the Terminal app from your app drawer. Your Linux environment now has access to microphone audio capture.
Configure your audio input in Linux apps
Open your audio recording application and select the correct input device from the available options. For USB microphones, look for options labeled “sysdefault: Mic 0” or similar designations.
You’ll need to repeat this process each time you restart your Chromebook. The setting doesn’t persist across reboots since it’s still in the testing phase.

Audio recording applications like Audacity work immediately once you select the proper input device. The system recognizes both internal and external microphones without additional configuration.
If you haven’t set up Linux on your Chromebook yet, check out our guide on how to install Linux on Chromebook before proceeding.
FAQs
Do I need to enable microphone audio capture every time I restart my Chromebook?
Yes, you must run the vmc start command with the audio capture flag after each reboot since the feature is still in testing.
Can I use both internal and external microphones with this feature?
Yes, microphone audio capture works with your Chromebook’s built-in microphone and any USB microphones you connect to your device.
Will this process become easier in future Chrome OS updates?
Chrome OS will likely add an experimental flag in a future version, making activation simpler before eventually enabling it by default.
Which Linux applications support microphone audio capture on Chromebooks?
Any Linux application that uses audio input will work, including Audacity, recording software, voice chat apps, and development tools requiring microphone access.
How do I know which audio input to select in my Linux app?
Look for options labeled “sysdefault: Mic 0” or similar names in your application’s audio settings. Test each option until you find one that works.